
Automating Teams School Data Sync - iSAMS
I don't like things that can't be automated. I started looking at School Data Sync (SDS) last year, however the templates provided by iSAMS, which is our school Management Information System, just gave a set of CSVs and you had to manually click to get them, then click to upload them into SDS. Since iSAMS has an API, I thought this was a bit of a silly way of doing things - who wants to go through a manual process every time a pupil changes class? So instead I wrote my own powershell to pull the data through the iSAMS API, then run through the New-Team cmdlet to create a team per class, and populate it with teachers and students.
As we're a school we need our new teams to be running the Edu_Class template, but the template parameter on New-Team only exists in the preview (and in Graph, on the beta endpoint) where it has much harsher limitations on how often and fast you can call it - a nightmare trying to call it in a loop. Anyway with the addition of "Start-Sleep 30" in the loop I eventually got them all created. However this time I am having another look at SDS and using Power Automate (previously known as Flow) to make the process completely automatic.
So a brief overview of what we need:
- iSAMS API with appropriate datasets
- Powershell script to create the SDS CSV files (I'm using v2 format)
- SDS Profile set up for the school year
- On-Premises Cloud Gateway to get the data from local server into Power Automate
- Power Automate Flow set up to link everything together.
- Appropriate licence for using data gateways in Power Automate (appears that an A3/E3 will do it, but not if you also have the free licences attached to your account)
iSAMS API
Log into iSAMS as an Administrator and go to the Control Panel -> API Services Manager. Click on Manage Batch Keys to the right, and if you do not have a spare key you will need to click Request Batch API Key.
Once you've got a key you can use, go into the Properties (the key with pencil icon) and then Batch Methods. Select the following five nodes:
- HR Manager Datasets: Current Staff
- Pupil Manager Datasets: Current Students
- Teaching Manager Datasets:
- Departments & Subjects
- Teaching Sets
- Teaching Set Lists
- Departments & Subjects
On the Key Properties page make sure to note down the API Key.
Scripting the CSV files and Cloud Gateway
You will need to pick a computer to run the Cloud Gateway and the powershell script which generates the CSV files. It can't be a domain controller but other than that anything running a 64-bit version of Windows 8 or Windows 2012R2 or later. More info on the Cloud Gateway can be found here.
Create a folder on your gateway computer for the iSAMS-SDS.ps1 Powershell Script - I went with C:\SDS - and another for the CSV files, I went with C:\SDS\CSV. As I have multiple SDS profiles I then created a folder per profile within the CSV folder, to give me:
C:\SDS\iSAMS-SDS.ps1
C:\SDS\CSV\Senior
C:\SDS\CSV\Prep
Open the powershell script in an editor and fill out the variables:
# Fill out variables:
$SchoolName = "MySchool"
$DFENo = "8889999"
$iSAMSHost = "isams.host.fqdn"
$iSAMSAPIKey = "AAAABBBB-CCCC-DDDD-EEEE-FFFFFFFFFFFF"
$DFENo can be anything you like, it is used as the school ID in the SDS CSV files, it has to be unique to your SDS setup so if you've only one school then "1" will do as an ID. I tend to just use the school's DFE number for things like this.
Now give the script a test run - you will need to work out which yeargroups you want to sync, and which subjects. You can either exclude or include subject IDs - it only syncs subjects if there are pupils and sets in the specified year group.
.\iSAMS-SDS.ps1 -CSVPath C:\SDS\CSV\Seniors -YearGroups @(7,8,9,10,11,12,13) -ExcludedSubjects @(7,15,16,47) -Suffix _2020_21
This will sync all subjects except 7,15,16,47 (these are things like lunch, detention, breaktime etc which appear on the timetable as subjects but we don't want teams creating for them) for years 7-13 into the Seniors folder, and it will stick _2020_21 at the end of each class name - so that when the teams are created you can tell which year cycle they relate to.
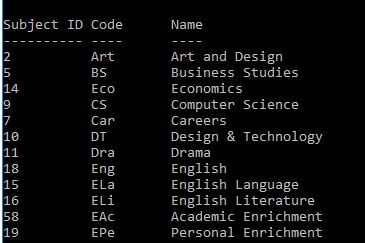
If you need to get a list of Subject ID -> Name, you can run:
.\iSAMS-SDS.ps1 -CSVPath C:\SDS\CSV -ViewSubjects:$true
Once it's gone through, it will output any pupils it has found with no e-mail address. If there's any of these you need to correct them in iSAMS, wait the cache expiry on the API key and try again.
Now have a look at the CSV files it has generated and check they make sense. There will be four files: orgs.csv, classes.csv, enrollments.csv and users.csv.
My second profile, Prep, uses the following:
.\iSAMS-SDS.ps1 -CSVPath C:\SDS\CSV\Seniors -YearGroups @(0,1,2,3,4,5,6) -IncludedSubjects @(52) -Suffix _2020_21
This will create a team for subject 52 only, which in my case is Registration as we just want a single class team for each of the Prep school forms.
Next up you need to set up a scheduled task:
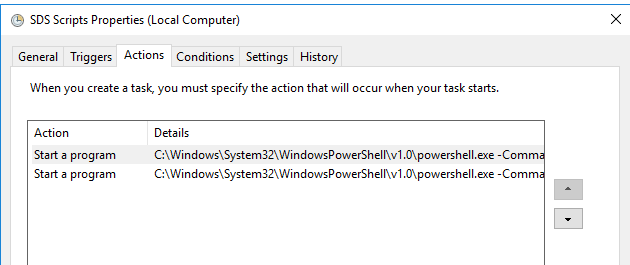
Give it a sensible name (e.g. SDS Scripts) and change the user it runs as to SYSTEM. Add a trigger of once daily at something like 10pm. Under Actions you will need to add as many rows as you have SDS profiles - so for me, two - Seniors and Prep:
Action: Start a program
Program: c:\windows\system32\WindowsPowershell\v1.0\powershell.exe
Arguments: -Command "& 'C:\SDS\iSAMS-SDS.ps1' -CSVPath C:\SDS\CSV\Seniors -YearGroups @(7,8,9,10,11,12,13) -ExcludedSubjects @(7,15,16,47) -Suffix _2020_21"
Right click the task and Run, then check you get each of the folders correctly populated with CSV files.
Set up SDS Profiles
Go to https://sds.microsoft.com/ and log in with a global admin account, then click on Add Profile. Enter your profile name, and choose to sync with Upload CSV Files, and SDS V2 format. Click Next.
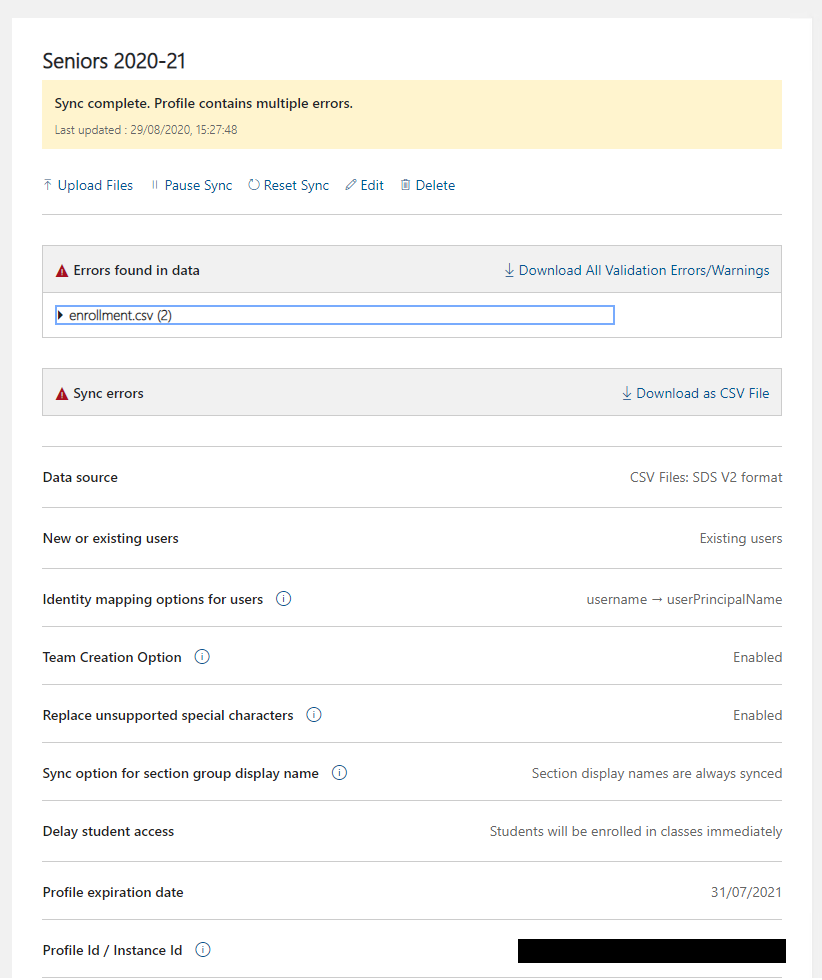
Upload the files for this profile which we generated by running the scheduled task earlier. Most things can be left at default, I opted to have unsupported characters replaced (forward slashes etc are changed to underscore in team names). Put in the date when you want this to stop syncing - I put 31/07/2021 which is the middle of the summer holidays -it wants it in US format though so month first.
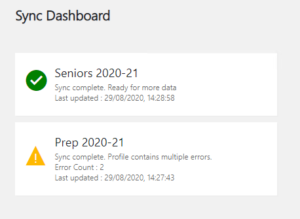
Once you've got it set up, it will process the CSV files and make the teams. Here it will tell you about any errors it finds. On my setup the only errors were due to a couple of students not having e-mail addresses in iSAMS. Note down the profile ID for each of your profiles.
Set up the On-Premises Cloud Gateway
Now we need to install the Cloud Gateway. The link to the installer can be found on this page. Follow the Step 1 and Step 2 instructions through, but when it comes to selecting the region you need to make sure it is the same region as Power Automate. In my case - everything except Power Automate is running from UK South, and letting it put the gateway there meant I couldn't access it from Power Automate. You can see which region it is in by going to the Power Platform Admin area.
For Step 3 you have already created the folders, so give your MACHINE\SDSServiceAccount user full control over C:\SDS\CSV (or whatever your chosen folder structure is). You should also already have the CSV files in place from testing the script.
Set up Flow
Follow through the steps shown here. Where asked for the root folder in Step 1.7 put in your CSV folder path, e.g. C:\SDS\CSV.
In Step 3.4 you need to enter the folder path for your profile's CSV files, so in my case the first Flow I set up was C:\SDS\CSV\Seniors and the second C:\SDS\CSV\Prep.
Once you've run through these you should have one flow per SDS profile:
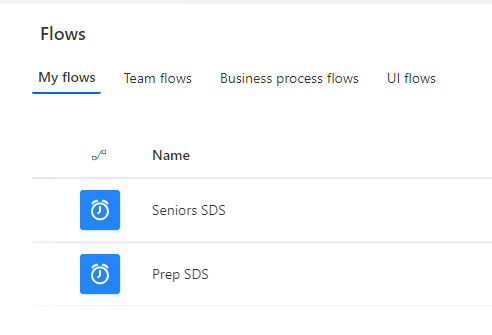
By default the flows are set to run daily at midnight. If you get an error running the flow and you've only just run it or pressed test, it will be because SDS is busy processing the files from the previous run so give it ten minutes or so before trying again.
We're done! Hooray.
Now you should have your SDS profiles set up, with the local script scheduled to create new CSV files daily, the Flow (one per profile) set to grab the data off the local machine and pass them over to SDS which will process them for us. Nicely automated.
In this post
- Introduction
- iSAMS API
- Scripting the CSV files and Cloud Gateway
- Set up SDS Profiles
- Set up the On-Premises Cloud Gateway
- Set up Flow
- We're done! Hooray.
Support My Work
I hope you find my content useful. Please consider tipping to support the running costs of hosting, licensing etc on my Ko-fi page.
