Project: Short Link Creator

As with all my web based projects, it's PHP and uses my standard "site template" back-end. You'll need MySQL (or something compatible like MariaDB), and access to the web server configuration files for your virtualhost (Apache) or web site (IIS).
Getting Started
First of all you will need a web server to install the project. I've tested it with Apache on Linux, and IIS on Windows Server 2019. You will need PHP 7 and the curl extensions installed on the server, and you'll need either MySQL server or MariaDB. Make a directory for the code, and then clone it:
git clone https://github.com/CoasterKaty/RedirectTool.git
Or alternatively download it from the GitHub repository.
This will give you a directory structure containing two folders: inc and www. You will need to configure the root of the website to be the www folder, so in Apache you'd set DocumentRoot /path/to/RedirectTool/www, in IIS this is within the Basic Settings for the site. The inc directory should not be accessible from the website.
Create a new database on your MySQL/MariaDB server, and then run the contents of the database.sql file to create the tables and set up the initial data. Set up a user account for this database, it will need SELECT, INSERT, UPDATE and DELETE privileges on this new database.
Now we need to set up the configuration file. Make a copy of inc/_config.inc called inc/config.inc and edit it in a text editor. Fill out the database fields, and the _URL field. This should be the URL to your website, with no trailing slash - this is used when communicating with Azure AD logon servers.
define('_MYSQL_HOST', 'Hostname of the MySQL server here');
define('_MYSQL_USER', 'Username you created for the database');
define('_MYSQL_DB', 'Name of the new database');
define('_MYSQL_PASS', 'Password for the database user');

define('_URL', 'https://domain.used.by.this.website');
Azure AD App Registration
Next we need to create the Azure AD App Registration. Go to the Azure AD > App Registrations page and create a new registration. Enter the name of the app (this is displayed on the logon page, can be anything you like), and select Single tenant as the supported account type. (In a future version I hope to add multi-tenant support). Fill in the redirect URI with the domain you are using for this site, followed by 'oauth.php', e.g. https://redirecttool.katystech.blog/oauth.php and click Register. This domain must match the value entered earlier in the _URL field.
We can now fill out a bit more of our config.inc file, using the Application ID and Directory ID displayed on the App Registration page.
define('_OAUTH_TENANTID', 'The Directory ID from the App Reg screen');
define('_OAUTH_CLIENTID', 'The Application ID from the App Reg screen');
We also need to set up how the application will authenticate itself to Graph. There are two options here:
- Client Secret: A complex text password. Easiest to set up but least secure
- Client Certificate: A public/private key pair, harder to set up but most secure.
Option 1: Client Secret
If you want to use a client secret, go to the Certificates & Secrets page in the App Registration, and add a new client secret. Copy the value (not the ID) of this, and go back to config.inc:
define('_OAUTH_METHOD', 'secret');
define('_OAUTH_SECRET', 'client secret value');
Option 2: Client Certificate
If you want to use a client certificate, you will need to go through the process to obtain a certificate (generate CSR, submit to a certificate authority etc). Basically you will need the private key and the certificate itself in Base64 form, saved onto the server file system - I tend to put these one level up from the directory git created for us. Then in config.inc:
define('_OAUTH_METHOD', 'certificate');
define('_OAUTH_AUTH_CERTFILE', '/path/to/certificate.crt');
define('_OAUTH_AUTH_KEYFILE', '/path/to/privatekey.pem');
Now in Azure AD > App Registration , go to Certificates & Secrets, then Certificates, then upload the certificate.
Creating the App Roles and assigning users
Our next step is to create the App Roles and assign user accounts. In Azure AD > App Registration, go to App Roles and add the following two roles:
- Name, Value & Description: Role.Admin, Member Type: User/Group
- Name, Value & Description: Role.User, Member Type: User/Group
Next head to Azure AD > Enterprise Apps, find your application then edit the Properties. Set Assignment Required to Yes, then under Users and Groups add the users you wish to have access with the appropriate role. The Role.Admin role has permissions to create and delete domains and can create/delete any link on any domain, Role.User has permission to create links on any non-restricted domain, and can delete their own links.
Configuring the Web Server - IIS
In IIS, you will need to configure a custom 404 error handler. The contents of your web.config file should look like the below:
<?xml version="1.0" encoding="UTF-8"?>
<configuration>
    <system.webServer>
        <httpErrors errorMode="Custom" defaultResponseMode="ExecuteURL">
            <remove statusCode="404" subStatusCode="-1" />
            <remove statusCode="500" subStatusCode="-1" />
            <error statusCode="404" prefixLanguageFilePath="" path="/link.php" responseMode="ExecuteURL" />
        </httpErrors>
    </system.webServer>
</configuration>
Don't forget to add all the domains you wish to use under the server bindings, and if you want to use SSL you'll also need to configure SSL certificates for each domain.
Configuring the Web Server - Apache
In your VirtualHost configuration, you will need to add the following:
ErrorDocument 404 /link.php
Don't forget to point any domains you wish to use to this site, using either multiple VirtualHosts over the same directory, or using ServerAlias on a single VirtualHost.
Launching the Redirect Tool
Navigate to /create.php on the domain you set up the project, e.g. https://redirect.katystech.blog/create.php. You should then be directed to log in - use an account which you assigned the Role.Admin role earlier.
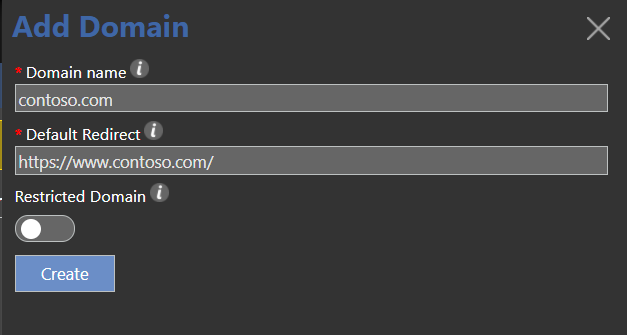
Your first task is to add a domain to the system - click on Domains, then Add Domain. Enter the domain you wish to use to generate links, and the default redirection you wish to send any invalid links to. You can also toggle whether this domain is restricted or not - on a restricted domain, only its creator and other admins can create links.

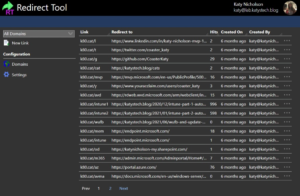
Once you've finished adding domains, click on Short URLs. From this page you can filter by domain, and add/delete short links. Existing links can be deleted (if the logged in user has the appropriate permission) through the menu button at the right of the table rows. You can configure how many rows appear per screen by clicking on Settings.
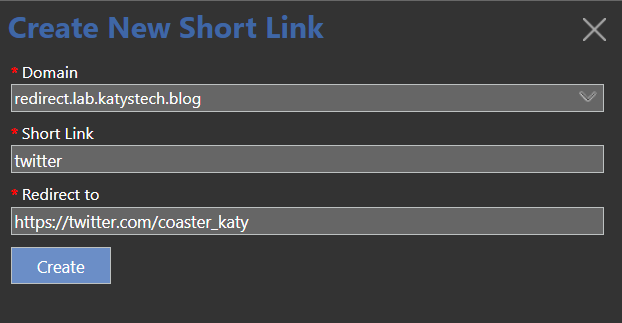
To create a new link, click on New Link and fill out the details.

Testing
Hopefully you've managed to configure the system, add a domain and create your first short link. If you try and visit this short link you should be redirected. If this isn't working, double check:
- For Apache, that you added the error handler for the 404 page, and reloaded the server configuration
- For IIS, that the error page is set up correctly. The easiest way to do this is make a change which generates a web.config file and paste in the template earlier in this post.
In this post
- Introduction
- Getting Started
- Azure AD App Registration
- Creating the App Roles and assigning users
- Configuring the Web Server - IIS
- Configuring the Web Server - Apache
- Launching the Redirect Tool
- Testing
Support My Work
I hope you find my content useful. Please consider tipping to support the running costs of hosting, licensing etc on my Ko-fi page.

