
Azure Cloud Shell
![]()
Azure Cloud Shell is a great feature which gives you a PowerShell (or Bash) window in the browser. Whilst you can't access on-premise resources from the shell you can manage anything cloud based. By default there's a huge selection of Azure modules loaded, plus things like Teams.
There's no specific licensing for using the Cloud Shell - however you will need an Azure subscription and a storage account. This is required for it to store any settings, plus you can store your own scripts in this storage if you like.
The Cloud Shell is available from some of the admin portals, including:
- Azure Portal
- Office 365 Admin Centre
- Exchange Admin Centre (new version)
How do I get it?
To launch the cloud shell, click on the shell button along the bar at the top right of the Azure (or other) portal. You'll then be asked to select if you want Bash or PowerShell - I only work with PowerShell so that's what I've selected for mine, but if you want to use the Azure CLI commands you can select Bash.

Next you'll be asked to pick a subscription and storage account to use - if you don't have either of these you'll be guided through creating them. You can use the free trial subscription if eligible otherwise any other subscription (pay as you go, or Enterprise, or Visual Studio Enterprise). If you aren't planning on storing huge files on the cloud drive you'll find it costs very little (in my case about 1p a month).
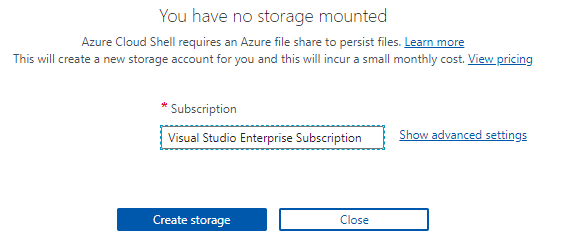
Worth noting that for each user that wants to use cloud shell, they'll need their own storage setting up, and will need permission to create resources under the Azure subscription.
Once you've got that set up, you should then see the Cloud Shell window load, and it will look like this. I've started off by running a command already, to load the Exchange Online session using Connect-EXOPSSession.
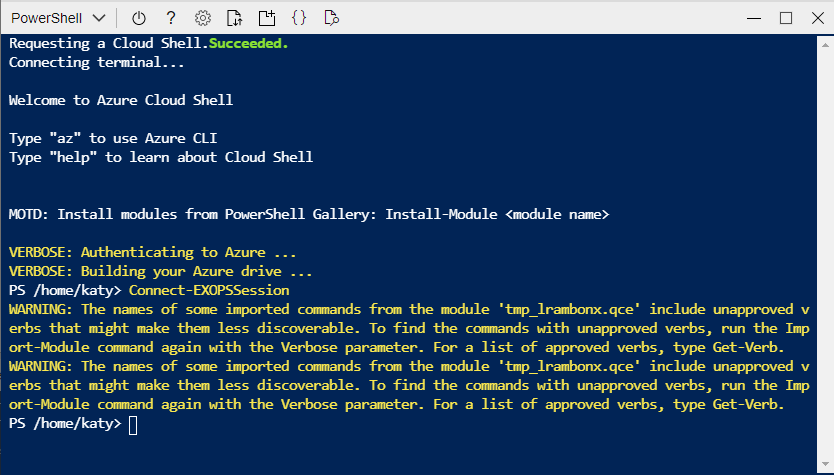
From the Cloud Shell you can basically use any cloud management PowerShell that you would have done from PowerShell running on your PC - so as an example to manage Teams you'd run Connect-MicrosoftTeams. If you need to authenticate, it will give you a code and send you to https://microsoft.com/devicelogin, where you'll authenticate with the appropriate user account - this workflow fully supports MFA so is much improved over the previous workflow where you'd have passed a Credential parameter.
What else can it do?
You will have noticed there's a toolbar along the top of the Cloud Shell which looks like this:

Going through the buttons in turn:
- Toggle shell language - PowerShell or Bash
- Restarts the Cloud Shell
- Displays some links to various help pages
- Set the text size and font
- Upload/Download files, plus view the cloud drive via "Manage File Share"
- Opens a new session
- Opens the editor window - this will give you a tree showing the file structure and a basic text editor.
- Web Preview
If you choose to upload scripts, you can just put them anywhere within your home directory (which is in the form of /home/username, stored in the $HOME variable). Anything saved within this folder is kept when the shell is closed, within a 5GB image stored in clouddrive/.cloudconsole.
Further Reading
In this post
Support My Work
I hope you find my content useful. Please consider tipping to support the running costs of hosting, licensing etc on my Ko-fi page.
