
In-place OS upgrade of Azure Virtual Machines
In-place upgrade of Windows 2016 Azure VMs to Windows 2019 is not officially supported but still something we occasionally need to do. While I'd recommend you spin up a new 2019 VM and migrate your workload if at all possible, it's a bit long winded but you can do an in-place upgrade.
If you're lucky it's as simple as copying the files off the ISO and running through the upgrade wizard, however if it brings up any prompts or messages you need to connect to the console to view you'd not get very far with a service like Azure where you cannot view the console, and this is one of the reasons why it is unsupported directly on Azure.
I've done two upgrades so far, one the following way and one just running the ISO. Both methods have worked out fine for me.
First of all you will need access to Azure with permission to manage the Virtual Machine in question, access to a storage account (or permission to create one), a local system running Hyper-V (this can just be a powerful PC running Windows 10), the Server 2019 ISO (or other installation source) and, if you don't want a very long wait, a decent Internet connection.
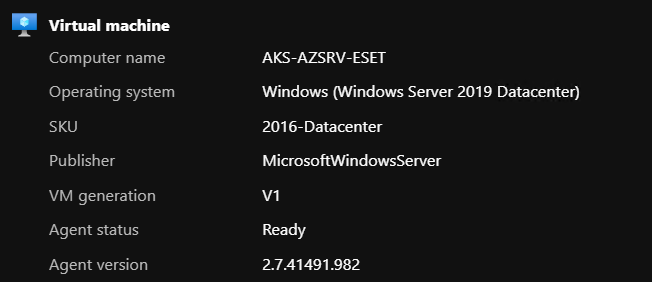
Log onto the Azure Portal, find your virtual machine and connect to its desktop. Give it a last reboot (incase there's any updates with reboots pending), then shut it down.
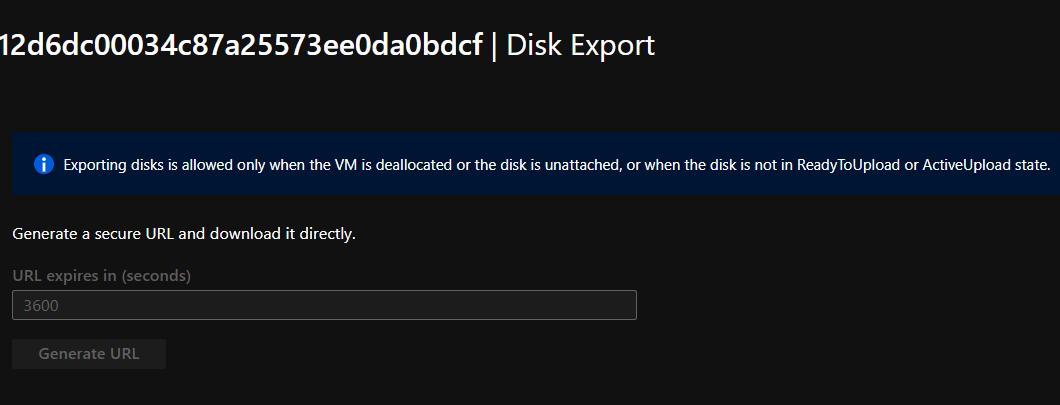
Next go to the Disks section, click on the OS Disk, then Disk Export. Click on Generate URL, then download the disk image. You will probably want to get your browser to prompt you for a download location first, if your default location doesn't have enough room for a huge VHD file. This took an hour for a 128GB VHD on my work connection - it seemed to average about 400Mbps.
If you can make a backup copy of the VHD incase it's needed.
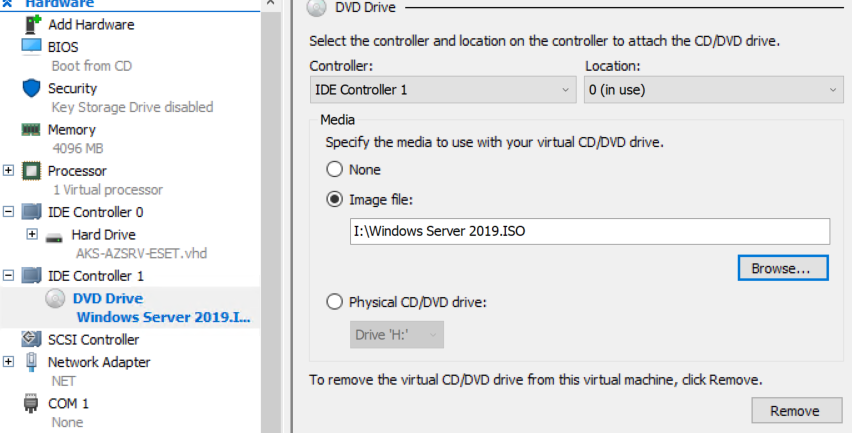
Next step is to open up Hyper-V and create a new virtual machine. Be sure to leave it at Generation 1, and then pick the downloaded VHD when prompted to create a virtual disk.
Start the virtual machine and connect, log on and run through the upgrade. Don't forget you need to pick the same edition (Standard/Datacentre) and type (Core/Desktop GUI) as your 2016 installation to be able to do an in-place upgrade.
Once it's finished updating, you are supposed to run sysprep /generalize however I didn't bother with this step and it still worked - I wanted to keep my VM joined to the domain and not have to mess about with any settings.
Shut down your Hyper-V VM, and if you have any checkpoints right click on them and delete them - this will merge any changes back into the original VHD file.
If you already have a storage account to use in Azure, skip ahead, Otherwise create a new storage account in the Azure Portal now.
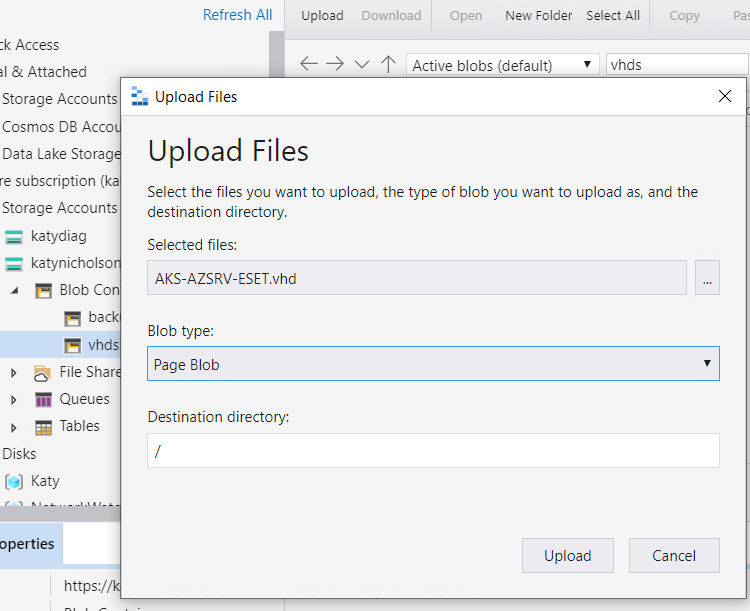
Next open up Storage Explorer and connect to your Azure subscription. Expand out your storage account, then Blob Containers, then a suitable container (create one if needed - I've called mine "vhds"). Next upload your VHD file. This took me about 20 minutes on the work connection for 128GB - running at pretty much 1Gbps.
Once uploaded, head back to the Azure Portal and create a new Managed Disk. Enter the name and other details, then for Source Type select "Storage Blob". Now for Source Blob find your newly uploaded VHD. Select that it contains an OS (Windows), and configure the disk size - don't forget to change the disk type at the top if you don't want the default Premium SSD. Once you've got this filled out click Create.
Now go to the Virtual Machine in the Portal, click on Disks and on the toolbar Swap OS Disk. Select the newly created disk, and enter your VM name for confirmation.
Now start the VM and with any luck your newly upgraded VM will boot up happily. When I tried this with my anti-virus console server, it even remained joined to the domain fine.
Support My Work
I hope you find my content useful. Please consider tipping to support the running costs of hosting, licensing etc on my Ko-fi page.
