
Intune: Manage non-DEP iOS devices via AC2 DEP enrolment

I often refer to DEP as "Autopilot for iPads", and Autopilot as "DEP for Windows". The Device Enrolment Program allows you to register your devices with Apple so that when they are reset and go through activation, any DEP-assigned configuration is enforced onto the device.
DEP (and Volume Purchasing Program) have since been rebranded into Apple School Manager (or Apple Business Manager), which I think is a good move by Apple as I find it a lot easier than having to remember the special VPP store URL whenever I want to get some new apps, and having to remember the DEP URL to alter any device assignments.
Assigning devices to DEP is something that traditionally the reseller/supplier needed to do - you'd give them your DEP ID when placing the order and put their reseller ID into your DEP portal, and the devices would appear - however you can now add other devices yourself using Apple Configurator 2. This is particularly useful for older devices that you didn't get set up on DEP, or if someone else in the organisation has randomly purchased some devices without speaking to you first from a supplier you don't have an existing relationship with. You'll need a Mac computer to run this - I use a Mac Mini - and it'll need to be a fairly recent version. In this post I'll go through how to set up AC2 to add devices to DEP, and then get them in to Intune for management. I'll be referring to Apple School Manager in this post but the steps for Apple Business Manager are the same.
I'm assuming that Apple School Manager has already been set up at this point, and you've already linked it to Intune and set up your Apple push certificate - I go over this bit in more detail in my Intune Part 3 - iPads post.
Any devices you add to DEP in this way will be completely erased, so you will need to take appropriate backups if required. You will also need to make sure they are not activation locked by removing them from "Find My (iDevice)" attached to whichever Apple ID may be signed in to them. Once you've completed this, the devices will be listed in DEP however on the device itself there will be a button called "Leave Remote Management" - this removes the device from DEP and erases it. This message will disappear after 30 days, it only appears on devices added to DEP via AC2 and presumably is to stop somebody borrowing a device, adding it to DEP and then holding it ransom.
If you haven't used Apple Configurator 2 yet you'll need to set up a WiFi profile to use on the devices - this is just used during the step where it activates and registered itself into DEP, and won't be installed on the device once you're finished. The first steps of my post on iOS WiFi profiles (up until the bit where you export it) will guide you through these steps.
Create an Enrolment Profile
Now we will need to create an enrolment profile in Intune, so go to Intune > Devices > iOS/iPadOS > Enrolment > Apple Configurator > Profiles and create a new profile. It doesn't really matter what options we select here as this is just required to satisfy a step in the wizard in AC2. Once we have the device in DEP we will be using the profile under "Enrollment program tokens" to set the device up.
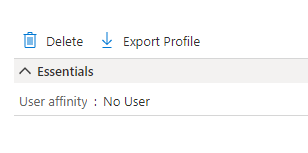
Now go into the profile and click Export Profile, then copy the Profile URL displayed. I tend to save this onto a text file on a USB stick but alternatively you could open the Intune portal in a web browser on the mac and copy it to the clipboard.
Configure the Devices
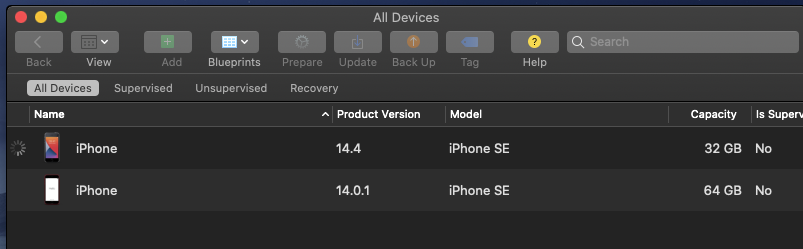
Plug the devices you want to enrol into the Mac and open Apple Configurator 2. You should see them listed in the main window - if the devices are already set up you might need to unlock them and say "Trust" at the prompt "Do you want to trust this computer?". Select your devices and right-click (or whatever the equivalent is if you're using a single buttoned mouse, Cmd+Click? I don't really work with Mac that much) and then click on Prepare.

Select Manual Configuration, and tick Add to Apple School Manager or Apple Business Manager. Then click on Next.
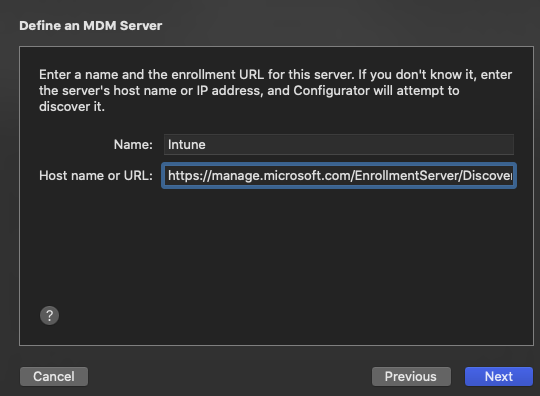
Click Next where it asks you to add a new MDM server, then fill out the URL you copied from the Intune profile earlier.
Click on Next, and you should then see a screen about trust anchor certificates. Leave this at the default (which should be the appleconfigurator2.manage.microsoft.com certificate and the intermediate and root CA) and click Next.
Now sign in with the Apple ID you use to manage Apple School Manager, and then when prompted say you want to create a new supervision identity. You can then select which steps you want to show/hide during setup although, as with the profile settings earlier, this will not be used as we will be pushing the Enrollment Program profile from Intune.
Your final step in the wizard asks if you want to add a profile containing wireless network details. I'm not sure how crucial this step is but I usually provide it with one so that it can contact the activation servers and be registered for DEP.
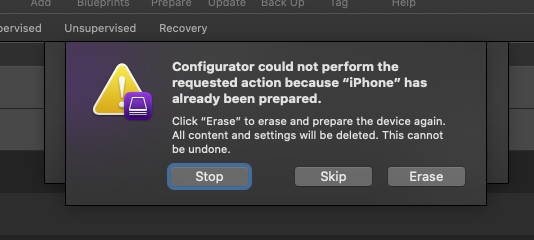
If your devices have already been set up you might see this prompt - here just click on Erase to continue.
Allocate to Intune MDM
Now open Apple School Manager, and click on Settings. You should see an entry has appeared under MDM Servers named "Apple Configurator 2" and it should show a device count next to it. Click on this item, then click on Show Devices and then Edit Device Management. Pick your Intune MDM server from the list and click Continue.

You can now move back to Intune > Devices > iOS/iPadOS > Enrollment program tokens and click on your token, then click Devices and finally Sync. Your newly enrolled devices will shortly appear and you can assign them a profile and set them up as per the Intune Part 3 - iPads post.
Further Reading
In this post
- Introduction
- Create an Enrolment Profile
- Configure the Devices
- Allocate to Intune MDM
- Further Reading
Support My Work
I hope you find my content useful. Please consider tipping to support the running costs of hosting, licensing etc on my Ko-fi page.
