App Protection Policies
Corporate devices can be fully managed and secured using Mobile Device Management (MDM) such as Intune. But what about securing personally owned devices? This is where Mobile Application Management (MAM) steps in. For iOS and Android devices, MAM in Intune is implemented through App Protection Policies. With these policies, we can segregate corporate data on personal devices and also put restrictions in place - for example, don't allow copy/paste between the corporate apps and the rest of the device, or requiring PIN or biometric unlock before the data can be accessed. In this post I'm going to go through how to create an App Protection Policy and cover the differences between iOS and Android.
App Protection Policies can be targeted to any app which supports them. This includes the core Microsoft apps such as Outlook, OneDrive, Office etc but also a range of third party apps.
Creating a policy
To create your policy, go to Intune > Apps > App protection policies, then click Create policy. Pick the platform (iOS/Android/Windows), and then fill out basic information as usual - Name, optionally description. Click Next to move onto the next section - Apps.
Apps
In this section you are going to define which apps you want to target with the protection policy. There are a few settings here which need a little explanation:
- Target to apps on all device types - Yes to target all devices - both managed and unmanaged. No if you want to be more specific and exclude one of the two options.
- Target policy to - select which apps you want to target with the policy.
- Selected apps - you select the apps you want from a list
- All Apps - all apps which support App Protection Policies
- All Microsoft Apps - all Microsoft published apps which support App Protection Policies
- Core Microsoft Apps - this includes Edge, Excel, Office, OneDrive, OneNote, Outlook, PowerPoint, SharePoint, Teams, To Do, and Word.
If you went with Selected apps you can now pick these from a list for both public and custom apps.
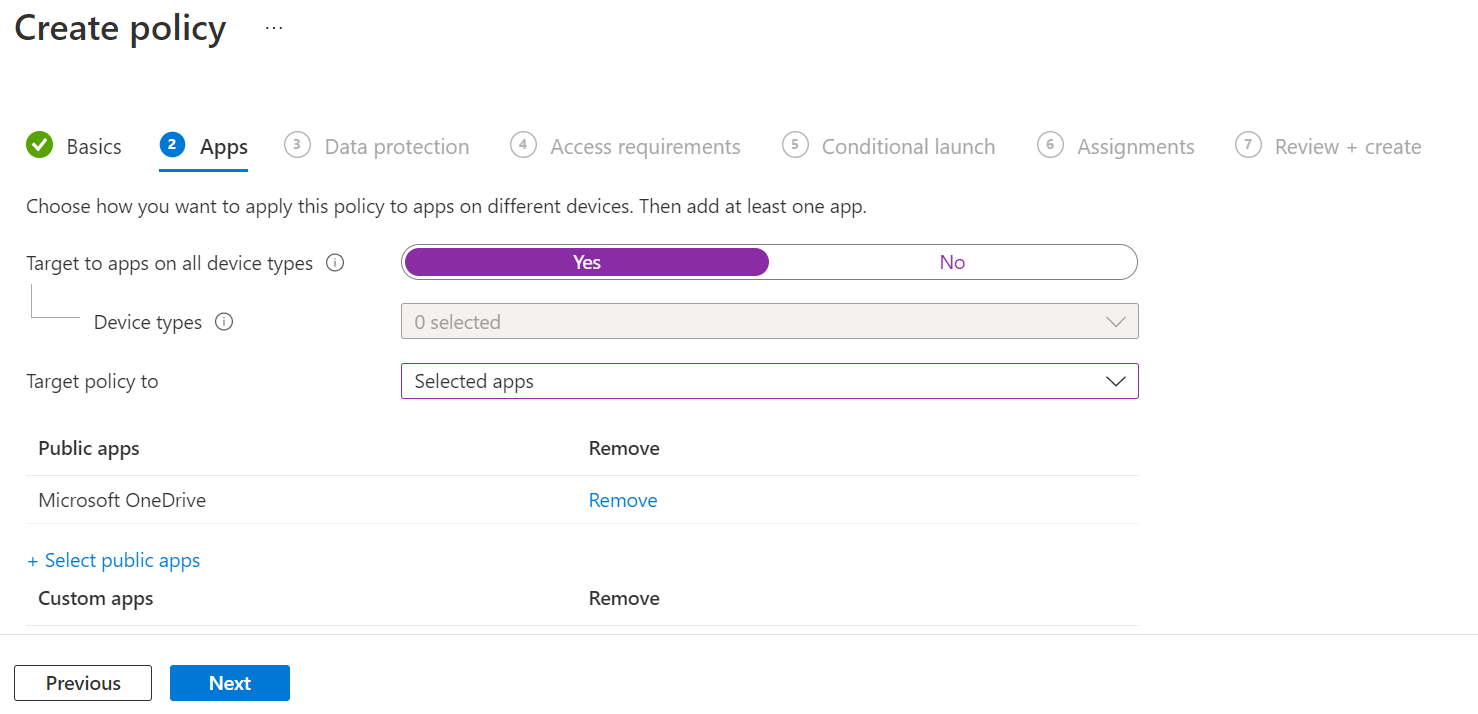
Now click Next and move on to Data Protection.
Data protection
In the Data Protection section, we will define various settings aimed at protecting corporate data, for example allowing the data to be copied between apps, printed or backed up. Most of the settings here are self-explanatory (and most have the "info" icon you can hover the mouse over to get further information).
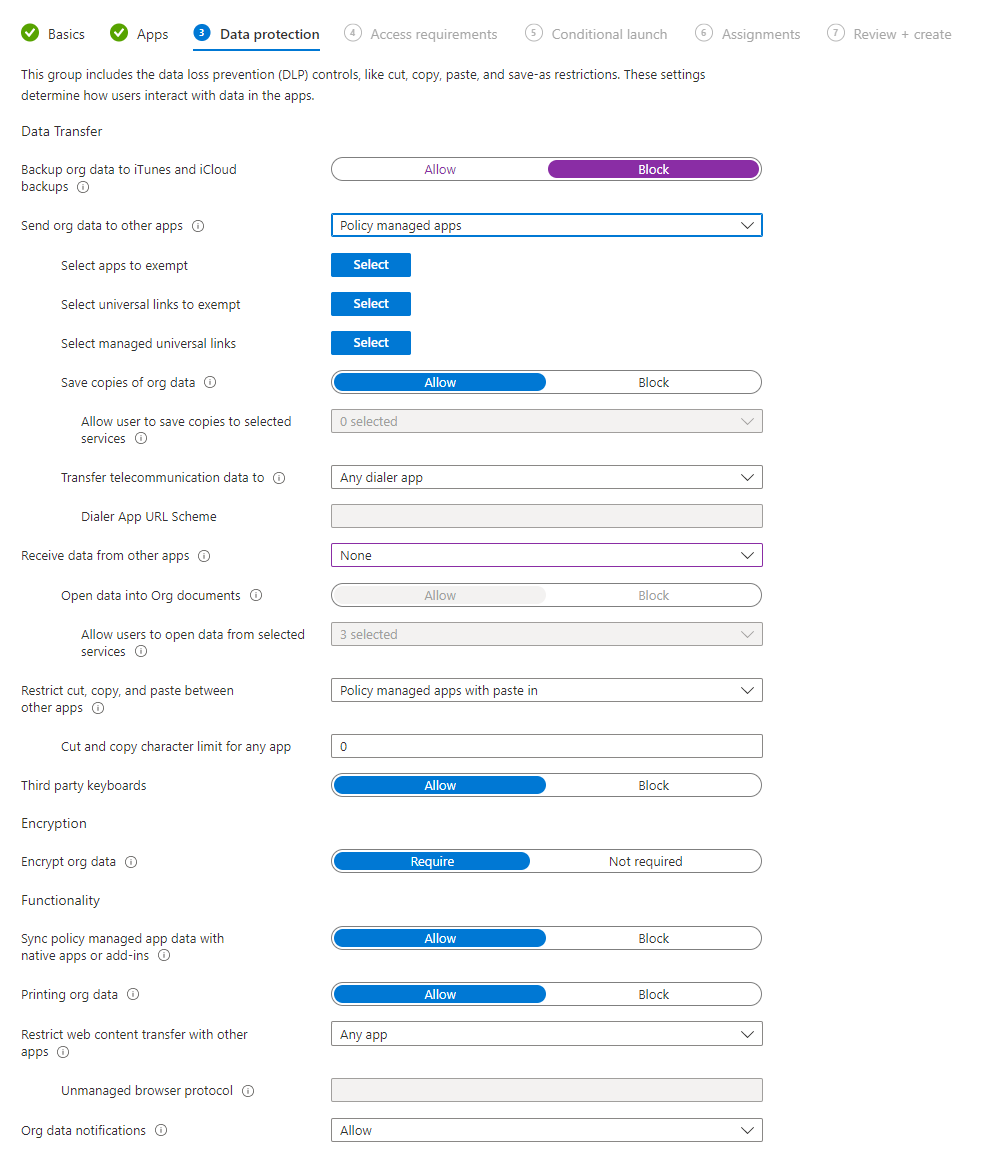
Key bits worth pointing out are:
- Send org data to other apps - your choices here are to allow corporate data to be sent to all apps, no apps, or only apps which are managed by an App Protection Policy. To enable the settings nested beneath this option, you need to pick Policy managed apps and can then exclude apps if desired, block the user from saving copies of data - again you can exclude specific services from this, so you could allow the user to save data to OneDrive or SharePoint only.
- Receive data from other apps - your choices here are again all apps, no apps or policy managed apps. Selecting policy managed apps opens up the next setting where you can block users from opening files which originate outside of corporate locations on the device.
- Restrict cut, copy, and paste between other apps - here you can block this, allow from any app, or allow from policy managed apps. When allowing policy managed apps, you can opt to allow "paste in" - this allows the user to paste data into the app. A character limit can be set, so for example you can allow the user to copy 30 characters but prevent them selecting and copying entire sections of documents.
- Sync policy managed app data with native apps or add-ins - with this setting you can block policy managed apps from saving data to the device's built in apps, such as saving contacts or calendar entries to the device.
- Restrict web content transfer with other apps - this setting allows you to define which browsers the protected app can use to open web links. Options here are Any app, Edge, or a specified unmanaged browser app on the device.
- Org data notifications - allow or block notifications on the device from the protected app. A third option is available, block org data, which will allow the notification to be raised but while the device is locked, it will only display a message telling the user they have a notification, rather than displaying, for example a preview of a Teams message or e-mail.
The differences between iOS and Android policies here are:
- iOS: There is a section on configuring universal links when permitting corporate data to be sent to other apps. The exempted Universal Links are by default facetime.apple.com and maps.apple.com. Managed Universal Links are a whole range of links such as powerapps.com, teams.microsoft.com etc.
- Android: There is a setting to allow or block screen capture and the Google Assistant having access to the corporate data.
Click Next to move on to Access Requirements.
Access requirements
Now that we have configured the scope for our policy, and the data protection elements, it's time to look at Access Requirements. In this section we can configure things such as requiring a PIN for access to the app - so the user would have to configure a PIN, and then enter it each time they open the app. We can also toggle whether to allow the user to instead use biometrics (either Touch ID/fingerprint or Face ID) instead of a PIN if desired. Alongside this we can force the user to re-enter the PIN after a specific period of inactivity, and force PIN resets periodically. Finally we can force the user to sign in with their Azure AD credentials (work/school account) - if you have configured this as well as PIN for access, the user will be required to perform both actions to open the app.
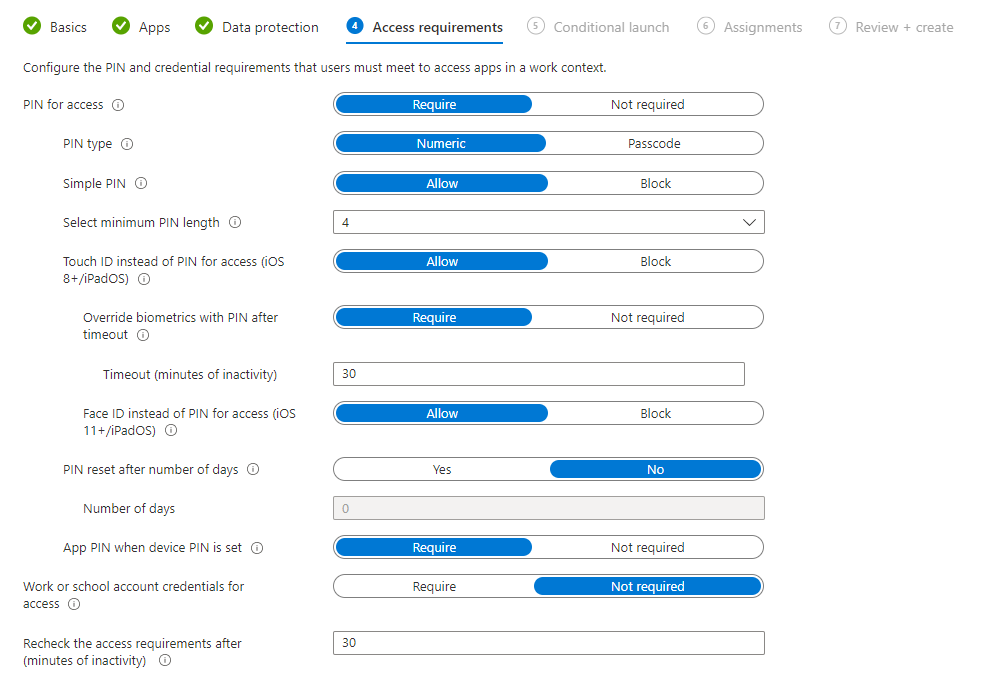
Now move on to Conditional Launch.
Conditional launch
Conditional Launch allows us to dictate certain conditions that must be satisified, by the app or the device, before the user is permitted to open the app and access corporate data. This screen is split into two sections - App conditions and Device conditions - and works in a similar way. You pick the setting you want to check, the required value (if applicable), and an action. The available actions varies depending on the setting you have picked.
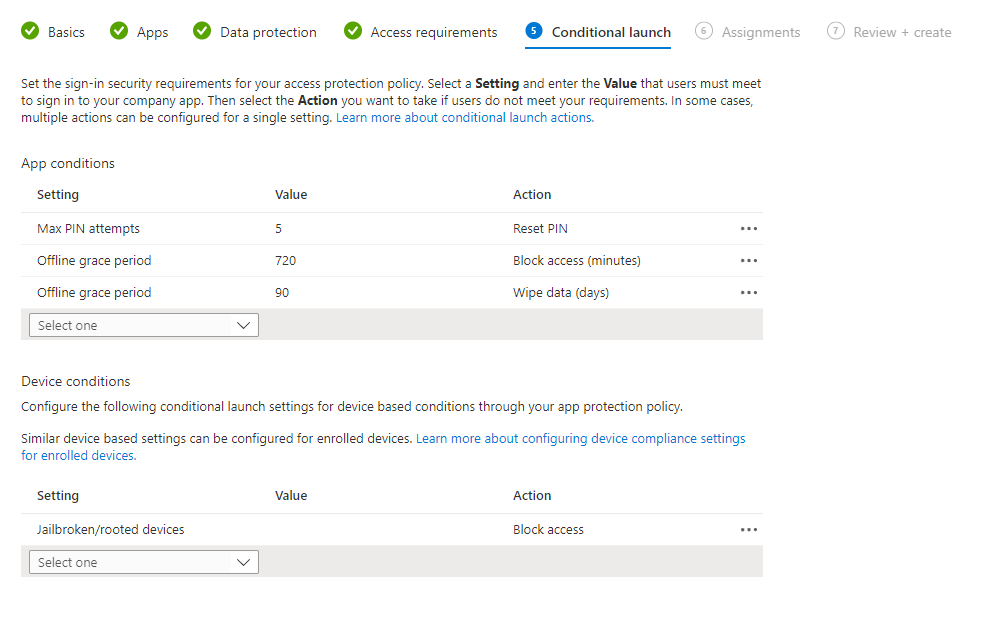
In the screenshot we can see that the user has a maximum of 5 attempts at entering an incorrect PIN before they are required to reset the PIN, and has two offline grace periods configured - if the device is offline for 720 minutes, access is blocked. If the device is offline for 90 days, the data is wiped when the device comes back online.
We can also see that if the device is jailbroken or rooted, access will be blocked.
App conditions
The settings available for app conditions are:
- Max PIN attempts
- Offline grace period
- Min app version
- Min SDK version
- Disabled account
Device conditions
The settings available for device conditions are:
- Jailbroken/rooted devices
- OS versions (min/max)
- Device Models
- Device threat level
Actions
The action available depends on the setting you have chosen but can include:
- Block access
- Wipe data
- Warn
- Reset PIN
Now complete the steps and assign the policy to a group of users or devices as fits.
Note: it may take up to 12 hours for a new policy to take effect, so be paitent when testing this in a lab.
Monitoring the Policy
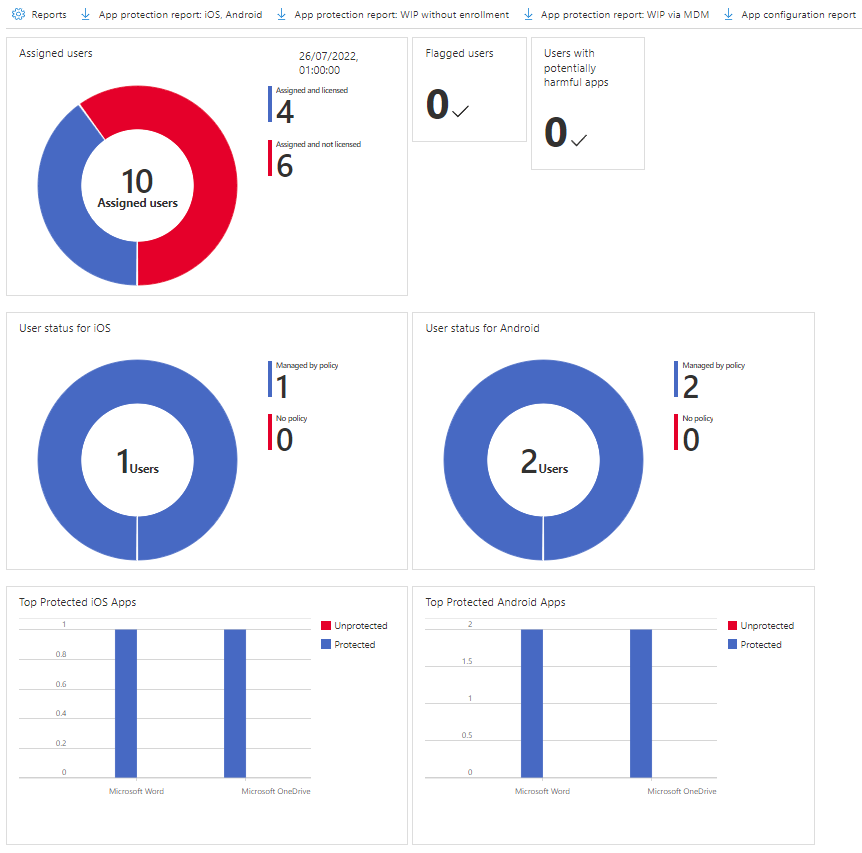
There is a limited overview of what the policy has applied to when you look at the policy's overview. It will show you the apps covered by the policy and the number of user check-ins.
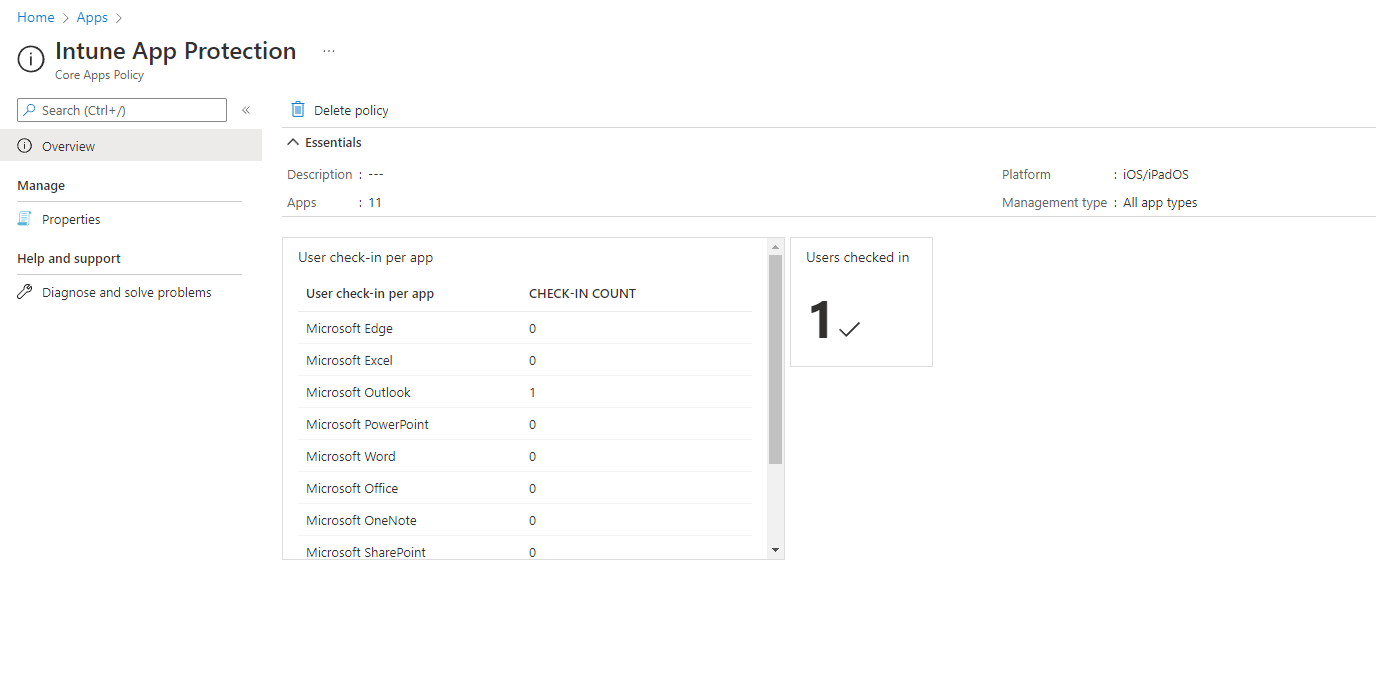
There's also a much more detailed App protection status report in Monitor - go to Intune > Apps > Monitor > App protection status to view this.
The detailed report includes all app protection policies, and will show you user status and top protected apps for iOS and Android. You can download various additional reports (as CSV files) through the toolbar:
- App protection report (iOS and Android)
- App protection report (WIP, no enrollment)
- App protection report (WIP via MDM)
- App configuration report
End User Experience
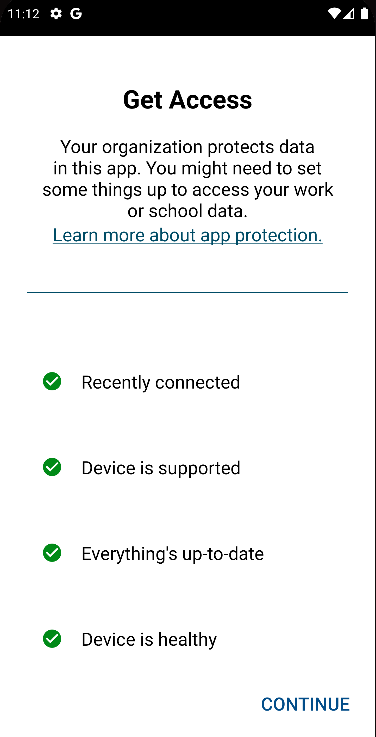
When the user tries to sign in to their work or school account in a protected app, they will be shown a screen informing them that they need to configure their device for app protection.
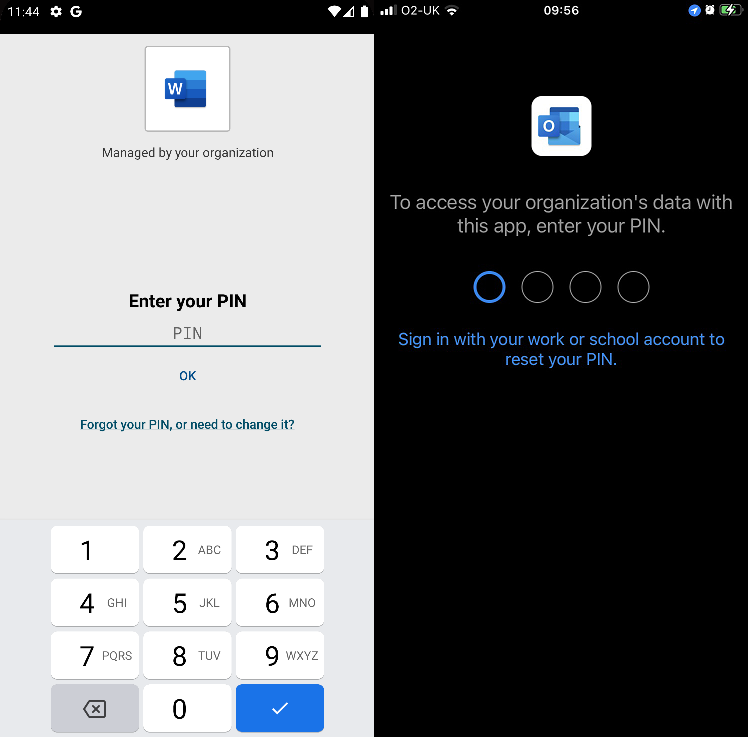
Once the user has added the account they wish to use to the app(s) on their device, they will see a screen similar to this prompting them to enter a PIN to access data. If you have permitted biometrics in place of PIN, they will see a prompt for Touch ID or Face ID, or the Android equivalent terms.
Issues
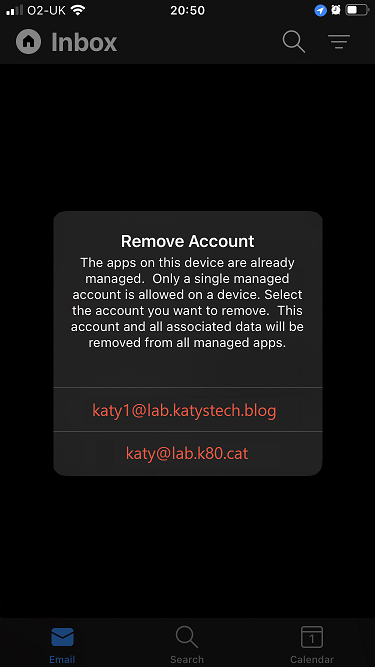
Unfortunately you can only have one managed account on most of the apps on a single device. So if the user is a member of two tenants, or has two different accounts on a single tenant, they will not be able to set both accounts if they are both covered by an app protection policy. Allowing multiple accounts is one of the most requested features around MAM so hopefully it will be addressed by Microsoft in the near future.
Further Reading
In this post
Support My Work
I hope you find my content useful. Please consider tipping to support the running costs of hosting, licensing etc on my Ko-fi page.


