
Intune: Deploying Applications
Today I'm going to look at deploying applications to devices managed by Intune. Back in part 1 I looked at enrolling devices, setting up Autopilot, some basic configuration policies and also created a few Azure AD groups containing the devices.
There's quite a lot of different application types in Intune, covering iOS, Android and Windows devices. As this series is focussed on Windows I'm not going to look at the iOS or Android ones at this time.
This post will go through the steps for installing/deploying the following:
- Microsoft 365 Apps - Hassle free Office 365 deployment,
- Microsoft Store Apps - primarily Store for Business/Education apps, including linking Intune to the Store for Business/Education, but you can also deploy without setting up the Business/Education store.
- Web Apps - essentially shortcuts to a website
- Windows Applications (Win32) - your traditional Windows apps which come with a setup.exe or setup.msi.
Microsoft Office 365
Installing Office is actually fairly straightforward. Head over to Apps > All Apps and click on Add. Select Microsoft 365 Apps - Windows 10 as the App type and click Select. This will then take you to an information screen where you can alter the description or feature in the company portal if you wish - I've just left everything at the defaults, then hit Next.
Now you can configure Office - those of you familiar with deploying this the traditional way will remember the Configuration designer, this is a similar thing. If you already have your configuration XML you can paste this in instead of filling out all the individual fields.
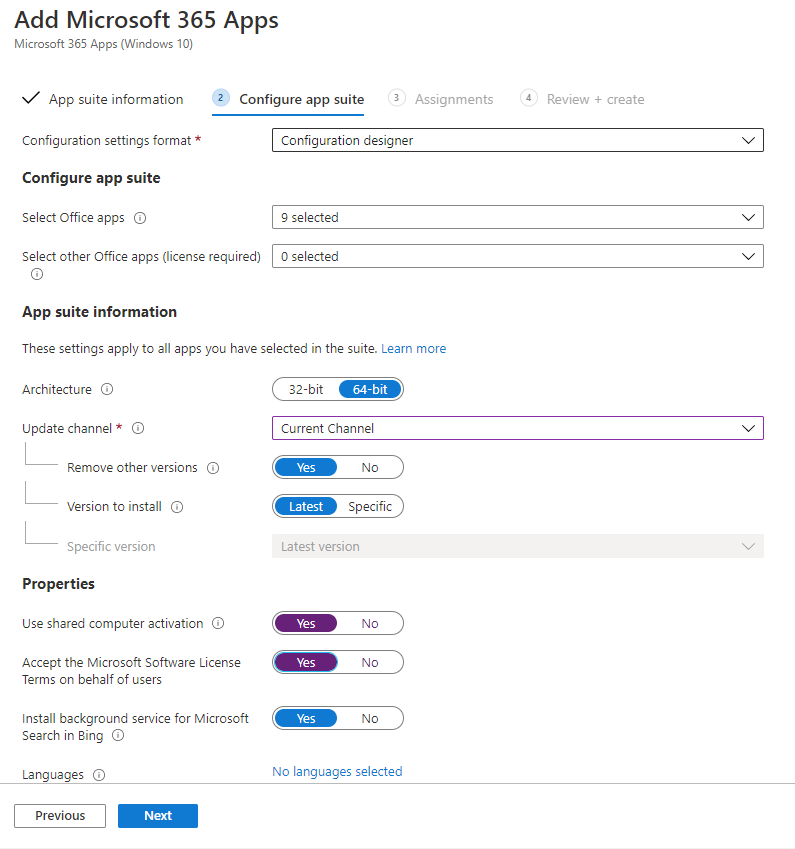
For my setup I've included the default apps but removed Skype for Business, as it is deprecated in favour of Teams on our tenancy. I've also gone for the Current Channel, opted for Shared Computer Activation as some of my devices will still be shared between many uses, and accepted the EULA so that it isn't prompting the end user. For more details on what the update channels are see this article. Now we go Next to the Assignments screen.
As per the Assignments screen on the profiles and policies in part 1 of this series of posts, I'll be adding a device group. In this case I've set it as a required deployment on the group Intune - Corporate Devices which we set up last time.

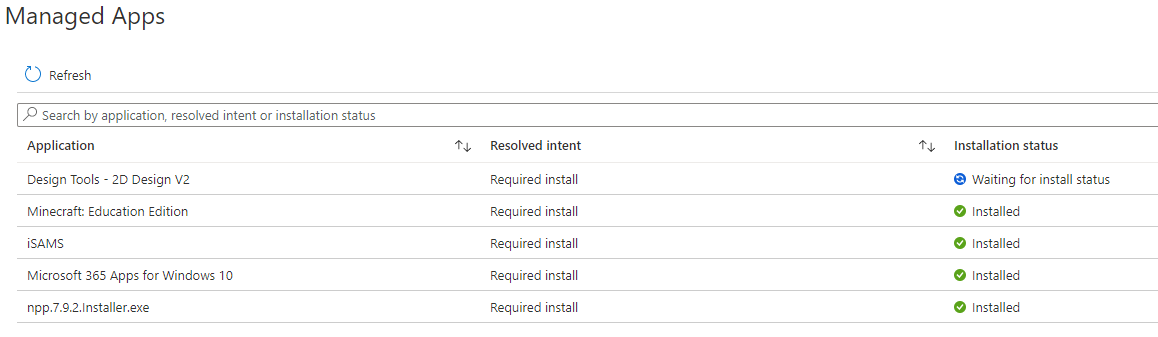
Finish the wizard and it's as simple as that - give it a few minutes, and check in on a test device's status by going Devices > Windows and selecting your device, then click on Managed Apps at the left. You should then see the installation status - it may take a while to show up, and you may need to go back to Overview and click Sync to force the device to check in.
Full and more detailed instructions for deploying Microsoft 365 apps can be found at: https://docs.microsoft.com/en-us/mem/intune/apps/apps-add-office365
Microsoft Store apps
If you are using the Business or Education private store for your organisation you can link this to Intune and all your purchased apps will automatically appear in Intune. The main benefit of using the Business/Education store is that you can deploy your apps to devices rather than users, and you can mandate that an app is installed by setting it as a Required deployment. You also don't need to manually fill out the app details and installation URL for every app you want to install. You can still deploy apps if you don't use the Business/Education store integration but it's much more limited.
Linking the Business/Education Store to Intune
Head over to Tenant administration > Connectors and tokens > Microsoft Store for Business. Click on Enable and then open the business store and sign in with your global admin account, or an account with the appropriate permissions.
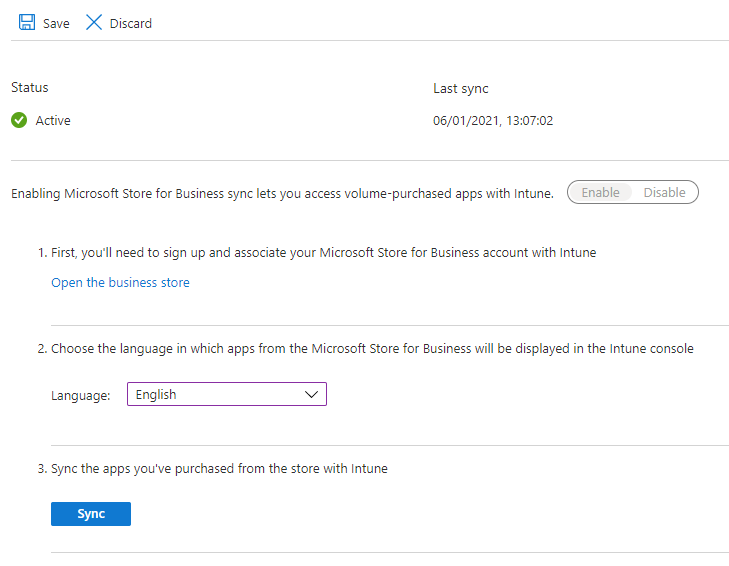
You'll now need to go to Manage > Settings > Distribute in the Store, at the bottom of the screen you should see a row for Microsoft Intune which you can click to Activate. Switch back to Intune and after a short while the Sync button should go blue - click it. It usually takes about 10 minutes to sync - you can check back on the status by refreshing the page and your last sync date should change from 1970 to something current.
Back on the Apps > All apps screen you should now see your synced store apps. To deploy one simply click on it, then go Properties and edit Assignments. As before you can then select a group of users or devices.
If you don't want to use or link to the Business store, you can still deploy store apps. Click on Add. Set the App type to Microsoft store app. Open the Microsoft Store and browse to the app you want to install. Copy the URL from the address bar, and go back to Intune. Fill out the Name, Description, Publisher and paste in the Store URL. The URL will look something like https://www.microsoft.com/en-gb/p/spotify-music/9ncbcszsjrsb.
The next screen is the familiar Assignments screen, however this time you can only set it as available for enrolled devices, and you can only add a user group or all users. This is what makes the business store method so much more powerful as we can deploy to devices rather than users and mandate that certain apps are installed. Click Next and your deployment should be created.
Deploying Web Apps
A Web App is basically just a link to a website. As with the majority of the app types, these can be deployed to users or devices. For iOS and iPadOS devices this adds an icon to the home screen, and for Windows devices it appears in the Start Menu.
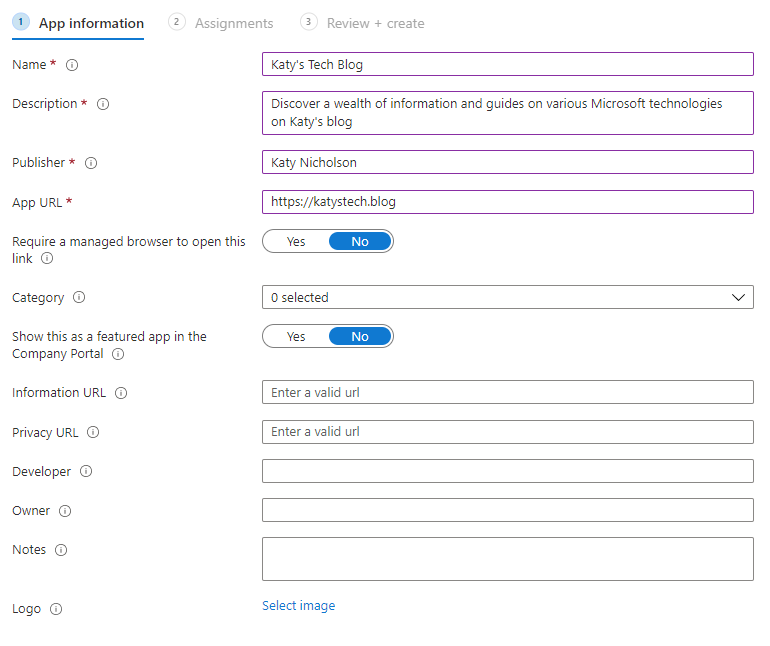
On Apps > All Apps, click on Add and select Web link as the app type. Fill out the Name, Description, Publisher and URL at a minimum.
Clicking Next takes you to the usual Assignments page where you can assign to users or devices. As with all apps you can see the deployment status on an individual device through going to Devices > Windows and selecting your device, then click on Managed Apps at the left.
Full details on web apps can be found in the Microsoft documentation.
Deploying other applications (such as those with a setup.exe)
Intune can deploy and manage the older application types such as those with a setup.exe, or an MSI installer, through Win32 app management. It's a bit more complicated than the other methods but it's a powerful addition to the toolset.
For this to work your devices need to be enrolled in Intune and either Azure AD joined, Hybrid Azure AD joined or Azure AD registered. The installer file must also be less than 8GB per app.
The application needs to be prepared using the Microsoft Win32 Content Prep tool, which will create a file in the .intunewin format. This is a command line tool that doesn't need installing. Before you start you'll need to create a suitable folder structure - I'm deploying Notepad++ so I've gone with D:\InTune\notepadpp and in here I've placed two folders, source and output. Put the source installation files into the source folder.
Next step is to run the command:
.\IntuneWinAppUtil.exe -c d:\intune\notepadpp\source -s npp.7.9.2.Installer.exe -o d:\intune\notepadpp\output -q
This should process the file and create an intunewin file for us to use in the next step, in the output folder.
Now on Intune, go to Apps > All Apps and click on Add. Select Windows app (Win32) and click Next. Click to upload your intunewin file, then click Next. Fill out any missing details from the first screen, then click Next. Now you'll see a set of screens familiar to anyone who has deployed applications with MEMCM.
Program - on this screen you'll need the install command, ideally with the required switches to make this a silent installation. For mine I've put in npp.7.9.2.Installer.exe /S as the install command and the Uninstall command I've set to "%ProgramFiles(x86)%\Notepad++\uninstall.exe" /S. Install behaviour I tend to set as System. If you've started with an MSI installer you'll find all this has already been filled in for you, along with the Quiet switch.
Requirements - here you'll set any requirements for the installation, such as whether you are targeting 32 or 64 bit (or both), minimum OS version, and memory/disk space requirements. You can also add additional requirements which can be one of the following:
File - whether a file or folder does, or does not, exist, or the date it was created or modified, or version, or size.
Registry - the presence (or absence) of a registry key or a string/integer/version comparison on a specific value.
Script - a PowerShell script to determine whether the device meets the requirements for the app.
Detection rules - these rules determine whether the app is already installed or not, to determine if the installer needs to run or not. Here you can manually configure rules or provide a PowerShell script. Manual rules include MSI (where you will need to provide the MSI product code - if you started with an MSI installer, this should be pre-filled for you), Registry or File.
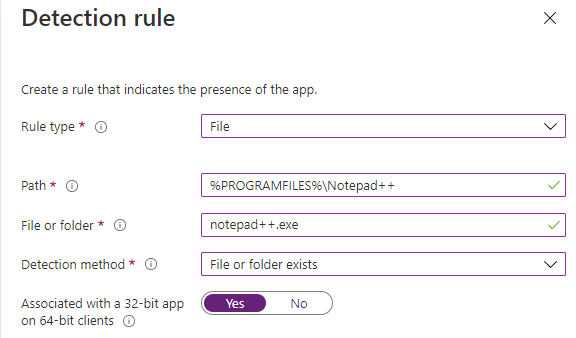
I'm going to use a File detection rule to check whether notepad++.exe exists in the Program Files (x86)\Notepad++ folder:
Dependencies - here you can set which other apps need to be installed before this app can be installed. I don't use this very often.
Assignments - the usual assignment screen where we'll deploy this to our Intune - Corporate Devices group.
Finally you can finish the wizard and your content will take a while to upload. As with the other apps you can monitor the status on the individual device's page.
Full details on this are in the Microsoft documentation: Deploying Win32 apps and Preparing Win32 app content for upload.
For installing an MSI installer, follow the same steps but provide the MSI file name as the source installer. When using an MSI as the source you'll find a lot of the steps have already been filled out for you. You'll still need to fill out Requirements, and Detection Rules doesn't fill out automatically however if you add an MSI rule type it will automatically fill in the product code for you.
Quite a long post there so hope you're still following - I'm really impressed at how neat all this is and how easily I can deploy applications to these devices without having to think about any on site infrastructure. If you've had a hot chocolate and a break you should now be able to go back to your device > Managed Apps screen and see some completed installations:
Further Reading
In this post
- Introduction
- Microsoft Office 365
- Microsoft Store apps
- Deploying Web Apps
- Deploying other applications (such as those with a setup.exe)
- Further Reading
Support My Work
I hope you find my content useful. Please consider tipping to support the running costs of hosting, licensing etc on my Ko-fi page.
