Intune: Managing Android Devices

I've been putting this off for almost a year but finally thought it was time I wrote a post about managing Android devices in Microsoft Endpoint Manager (aka Intune). It's no secret that I absolutely hate Android devices, which is probably why it's taken so long to do this, but we have a few at work which need managing so here we are.
I'm going to go through this using a standard g-mail account to link Google to Intune, into something called "Managed Google Play". From what I can work out, you don't need to set up anything fancy to do this, you just need the standard g-mail account (using an account tied to G-Suite or Google Workspace does not work for this). In this post I'll go through the various profile types - e.g. personally owned, corporate owned, fully managed, dedicated device (kiosk) and have a look on rolling out restrictions/certificates/profiles etc, along with some apps.
Our first step is setting up Android Enterprise. Go to the Intune/MEM Portal > Devices > Android > Android enrollment - there are two options here, we are going to ignore Android device administrator as it's deprecated, so click on Managed Google Play under the Android Enterprise heading.
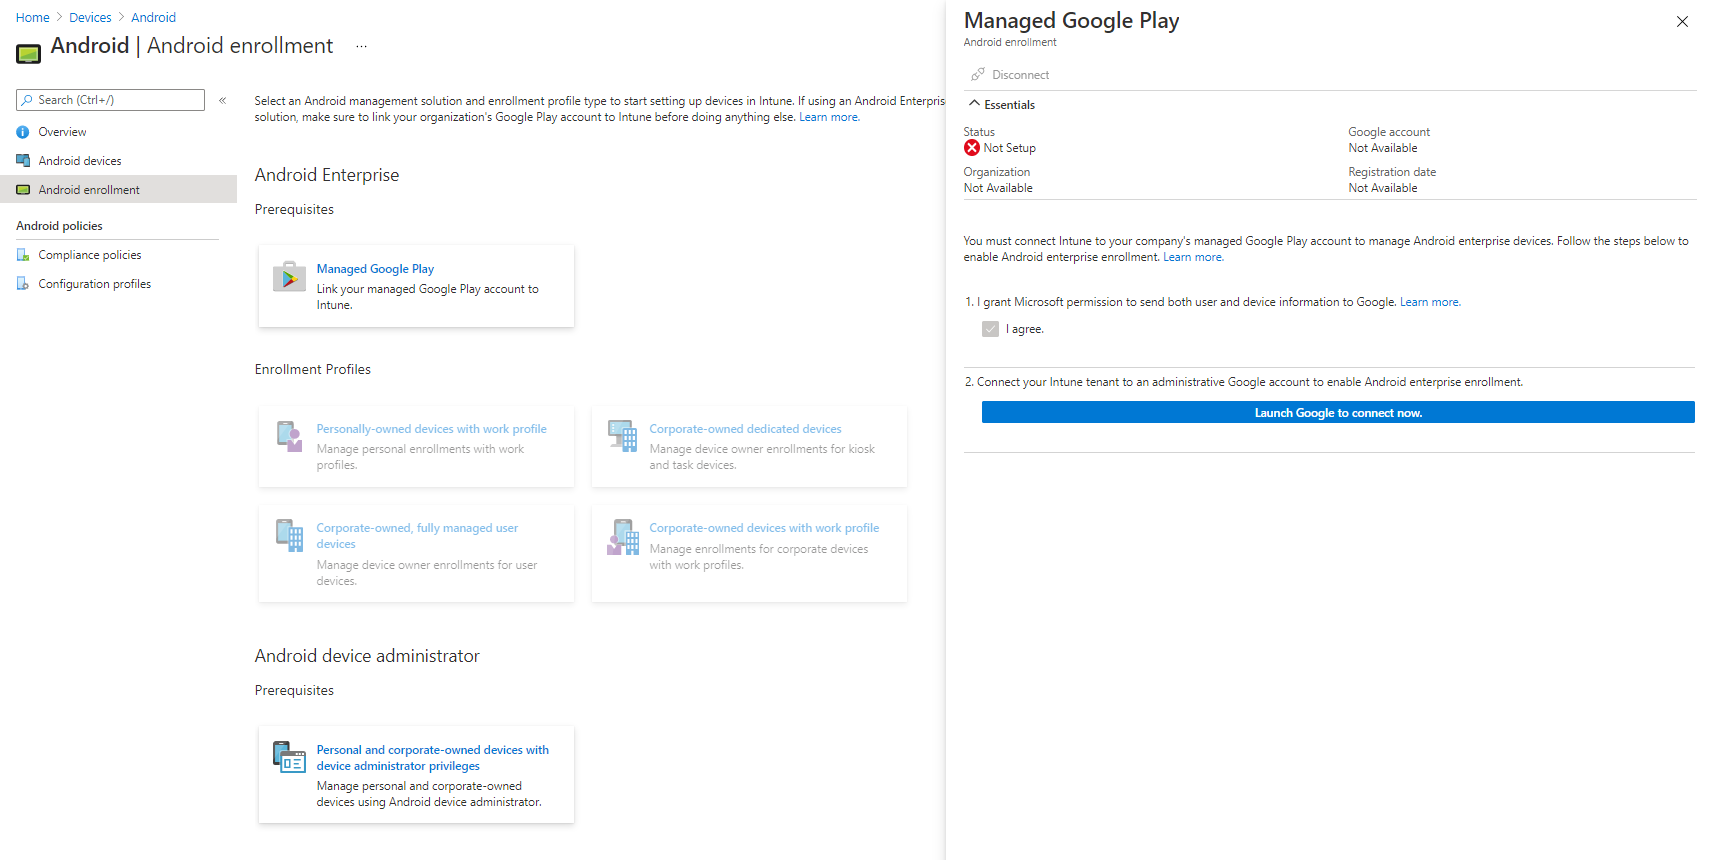
Tick the permissions box, and then press the button to link your account. There is probably a better way of doing this, but I don't use much from Google and it works fine with a standard g-mail account. Note this won't work with an account linked with G-Suite/Workplace.
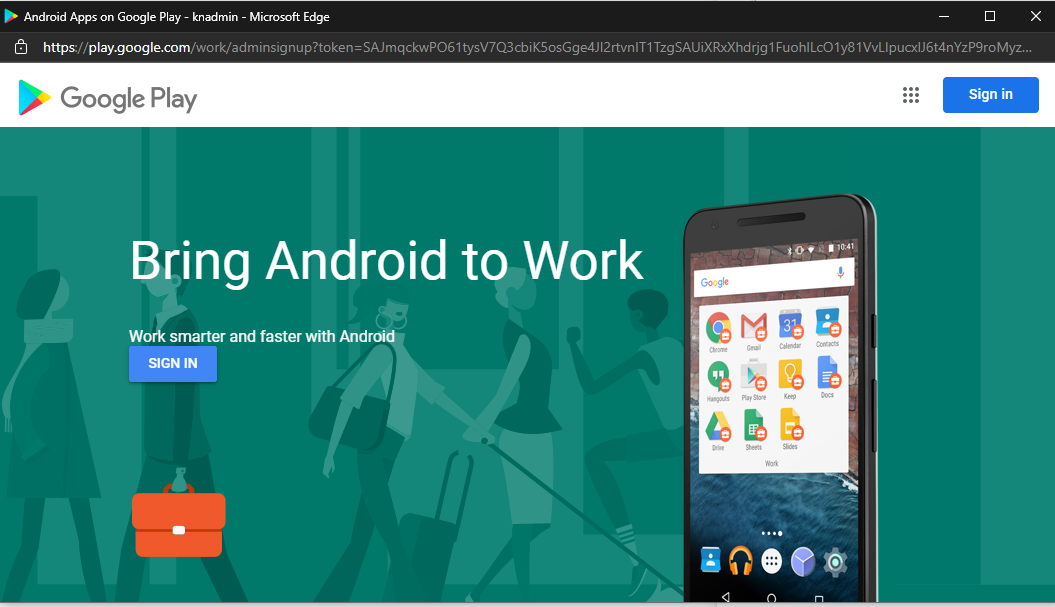
When signing in, I found I had to click on the left hand sign in button to be given a list of accounts (and the option to use a different account), the sign in button at the top right forced me to use my G-Suite account, which won't work. Work through the wizard and once complete you can start looking at the enrollment profiles.
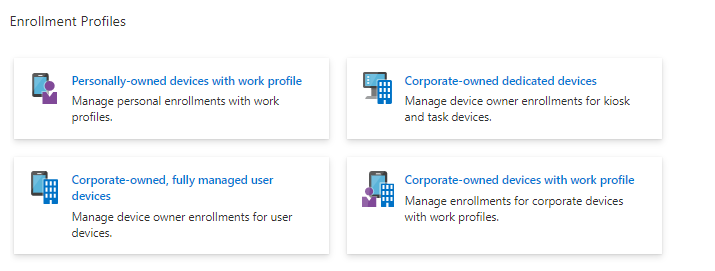
Corporate-owned dedicated devices
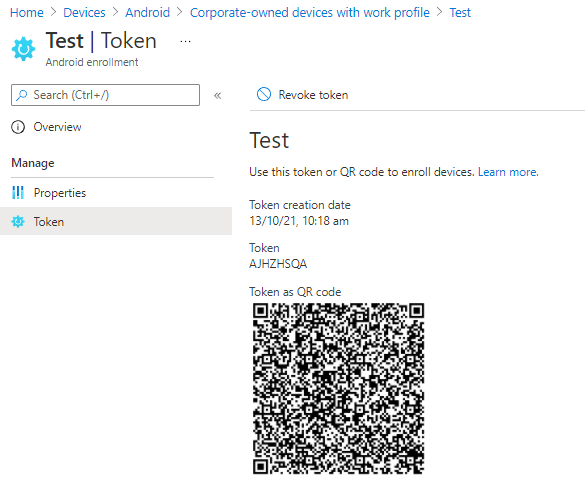
Click on the Corporate-owned dedicated devices button, and create a new profile. These profiles don't really have any settings, and the token can only be valid for up to 90 days. Run through the steps, picking "Corporate-owned dedicated device (default)" as the token type. Once this has completed you'll be able to click on the Token page, and if you then click Show Token you'll reveal a QR code. From this screen you can also revoke the token, or replace it when it's expired.
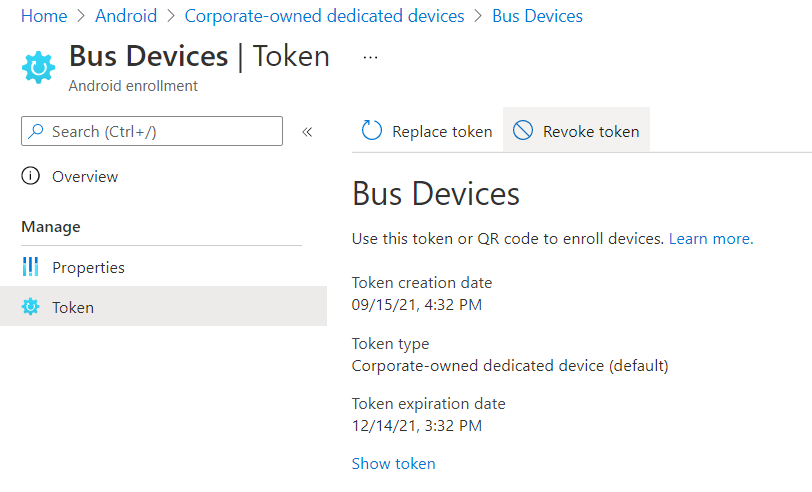
One further step you may wish to take, before you can apply profiles/apps etc to the device, is to create a dynamic device group in Azure AD (or an Intune filter) using the query enrollmentProfileName equals "Profile Name" and fill out the name you used when creating the profile, in my example "Bus Devices". When you're ready to enroll a device, move on to the Enroll Your Device instructions later on in this post.
Corporate-owned, fully managed user devices
Clicking on the Enrollment Profile button will bring up a screen with a QR code. This doesn't expire and can be shared with the end user, who needs to enroll their device as below.
Corporate-owned devices with work profile
Similar to the dedicated devices, you will need to set up a token. This doesn't expire but can be revoked.
Personally-owned devices with work profile
There are no settings for this section - by default the enrollment of personally owned devices is enabled. You can alter this through Enrollment restrictions.
Enroll Your Device
Once you've got a QR code from a profile, you can then enroll devices. The way I have been doing this is to erase the device (there are various ways to do this on the varying versions of Android and different manufacturers - on a Lenovo tablet I had to hold volume up, volume down and power at the same time, then release power once the logo showed, to enter a recovery mode where I could then factory reset the device).
- Once the device is wiped, tap multiple times on the first screen that appears (after it's booted, so the first "Get Started" kind of screen.
- Use the camera to scan the QR code and then follow the on-screen instructions.
Some of the profiles will ask you to set the device category, so make sure you have created one in advance.
Configuring Restrictions etc
As with Windows and iOS devices, there are a range of configuration profiles you can create and assign to your devices, covering things like device restrictions, certificates and Wi-Fi settings.
To create a profile for your Android devices, go to Devices > Android > Configuration Profiles, then click Create profile. Select the Android Enterprise platform, then the type of profile you want to create.
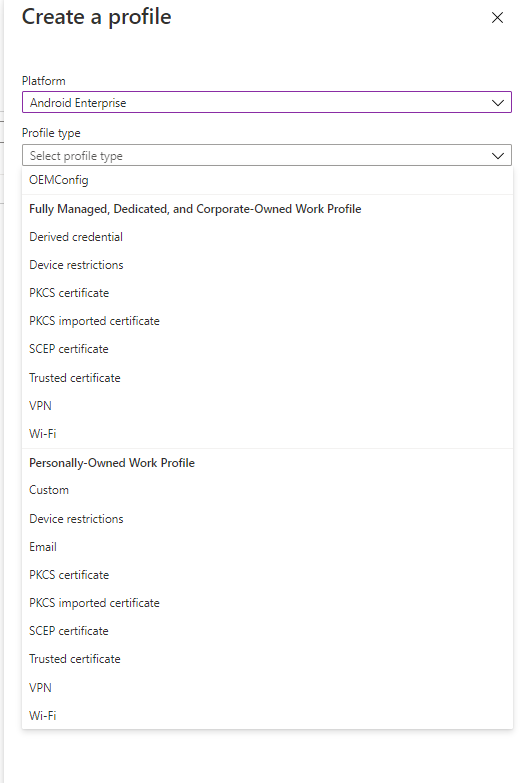
Follow through the steps to create your profile - in my case I've created Device restrictions, and configured the device to be in single app kiosk mode, specifying which single app I want the device locked to. You'll need to look at installing apps before you can set this up.
Another setting I've configured is trusted certificate, to import our AD root CA certificate onto the devices.
Your configuration profiles can be assigned using the standard Intune assignment screen - to a group of devices in this case, or to All Devices with an appropriate filter applied.
Installing Apps
You can install apps onto your devices through the Apps > Android section in the MEM console. I'm just going to walk through the Managed Google Play apps, as they seem to be the most useful in terms of not needing a Google account on the device and work a little like iOS VPP apps. Click on Add, then select the app type from the list.
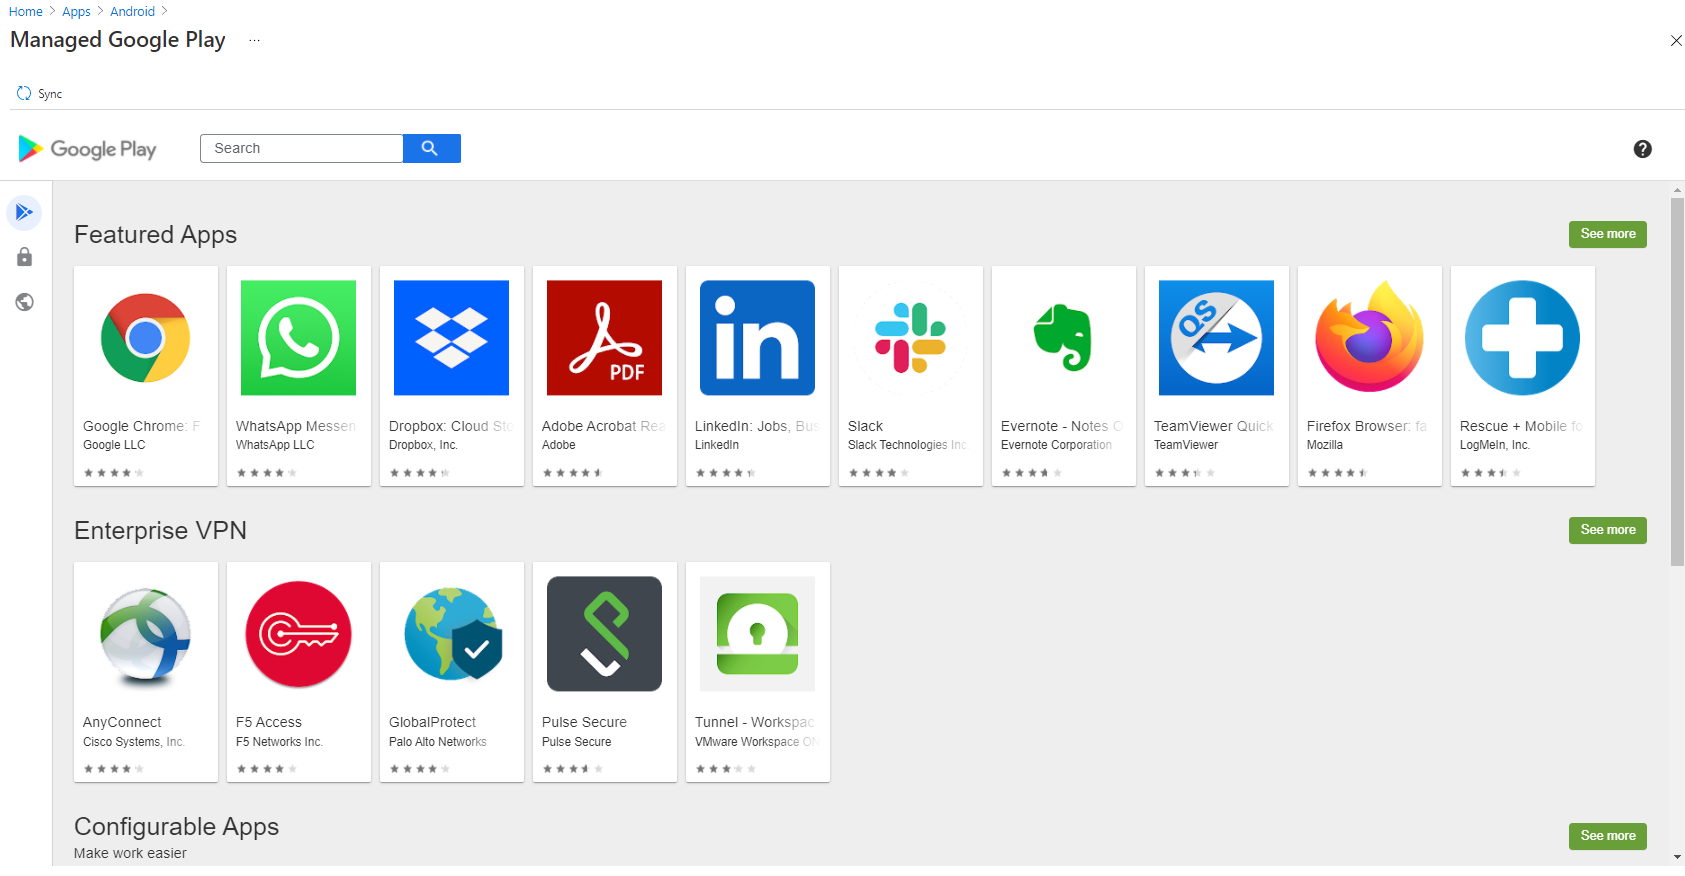
This is where it gets a bit clunky in my opinion, although I'm not sure if there's anything Microsoft could have done to make this any better. Search through the Google Play store which has appeared and find the app you want to deploy. Click on Approve.
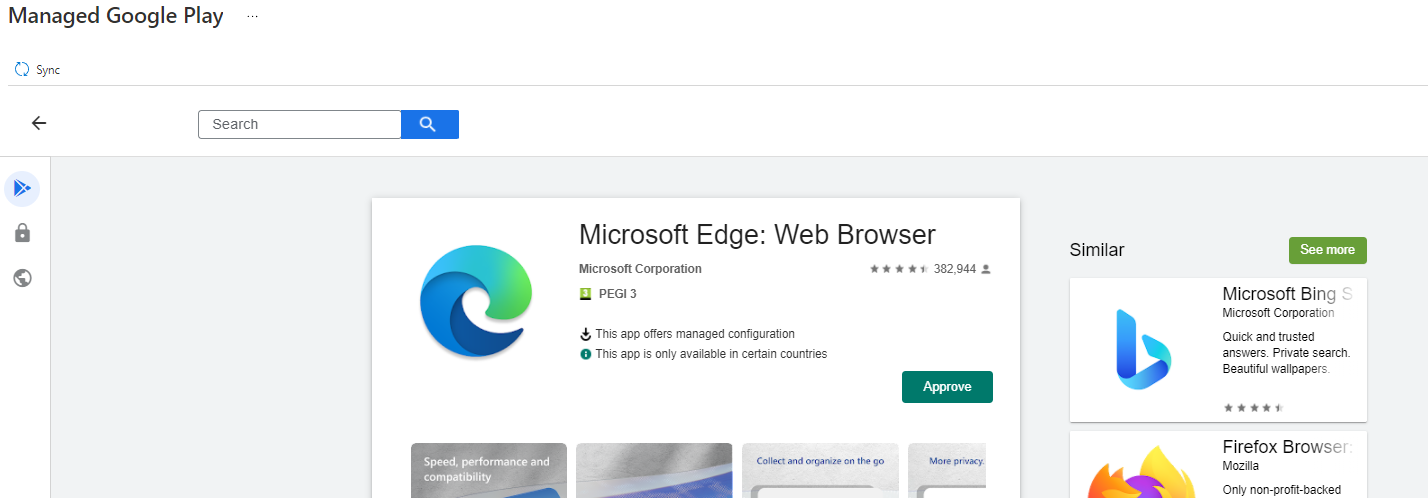
Click on Approve if prompted to accept app permissions, and chose the appropriate response when asked about handing app permission requests, then click Done. Next, click Sync at the top left.
You will now be taken to the list of Android apps which are available to MEM. If your app hasn't appeared yet, wait a while and refresh the list. If it still doesn't appear, try syncing again. Once the app has appeared, you can click on it and assign it to devices.

I'm not sure where the Total and Available licence data comes from as it just says 0 for all the apps I have deployed, although they do deploy and work just fine.
Further Reading
- Add and assign Managed Google Play apps to Android Enterprise devices - Microsoft Intune | Microsoft Docs
- Enroll Android devices in Intune - Microsoft Intune | Microsoft Docs
- Connect your Intune account to your Managed Google Play account. - Microsoft Intune | Microsoft Docs
- Setup Intune enrollment for Android Enterprise dedicated devices - Microsoft Intune | Microsoft Docs
In this post
- Introduction
- Corporate-owned dedicated devices
- Corporate-owned, fully managed user devices
- Corporate-owned devices with work profile
- Personally-owned devices with work profile
- Enroll Your Device
- Configuring Restrictions etc
- Installing Apps
- Further Reading
Support My Work
I hope you find my content useful. Please consider tipping to support the running costs of hosting, licensing etc on my Ko-fi page.

