
Universal Print

Universal Print is the new way to cloud print from your devices. It replaces Hybrid Cloud Print and is a lot easier to set up and manage. You'll need your devices to be connected to Azure AD (either domain joined or hybrid joined, or registered).
It's included in the following subscriptions:
- Microsoft 365 Business Premium
- Microsoft 365 Enterprise F3/E3/E5
- Windows 10 Enterprise E3/E5
- Microsoft 365 Education A3/A5
- Windows 10 Education A3/A5
There's also a stand-alone licence but this requires (but does not include) Azure AD.
You'll need to licence all users who are going to be printing, along with anyone who is setting it up and configuring it. Universal Print comes with a print job allowance per user, which is currently 5 print jobs per month, however these are pooled - so if you have 1,000 users, that's 5,000 jobs a month. Add-on packs can be purchased for an additional 500 jobs. Each print job counts as a job regardless of how many pages it is, and cancelled/failed jobs do not count. This is a little disappointing as I'm sure, especially in education, most users print more than 5 jobs a month. It has recently been added to the Student Use Benefit version of the A3 licence.
The idea is that printer manufacturers will produce UP Ready printers in the future, which register with Universal Print directly and don't need any sort of proxy or connector, however as we don't have any of these devices yet we just need to install a connector onto a Windows 10 PC or Windows 2016/2019 Server. It doesn't have to be at the same physical site as the printers you want to publish, it could be a virtual machine in Azure, so long as it has network connectivity to your legacy printers (e.g. VPN), however the printers do need to be installed onto this machine unfortunately.
Installing the UP Connector
Once you've assigned your account a Universal Print licence, grab the installer from https://aka.ms/UPConnectorMSI and run it on your chosen Windows 10/Server device. Make sure it's got .NET Framework 4.7.2 or later installed first. If you've got to update .NET don't forget it requires a restart, so don't try this on a production server in the middle of the day.
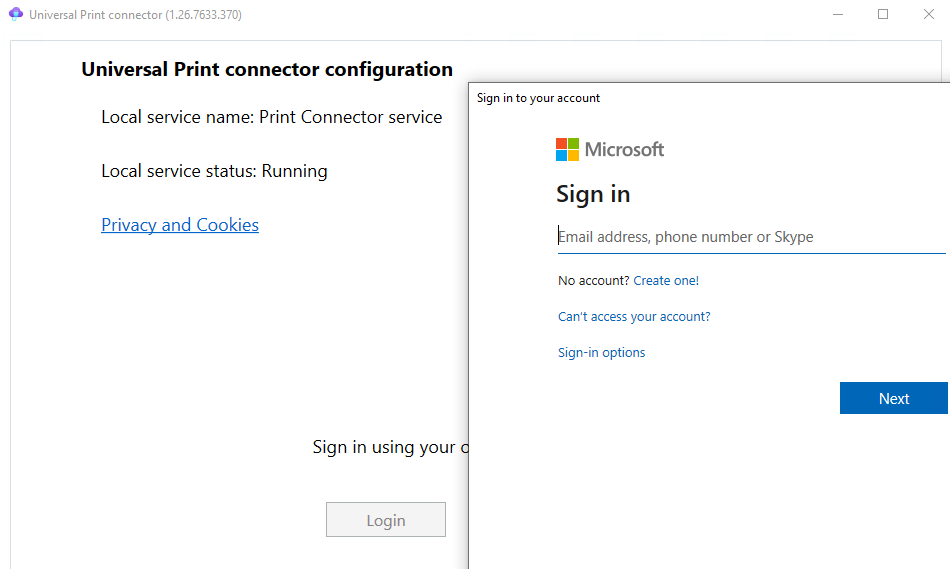
Once you've run through the installer, open Universal Print connector and log in with an account which has Printer Administrator or Global Administrator rights.
Now you're logged in, you need to register the connector. Enter a name into the box and click Register.
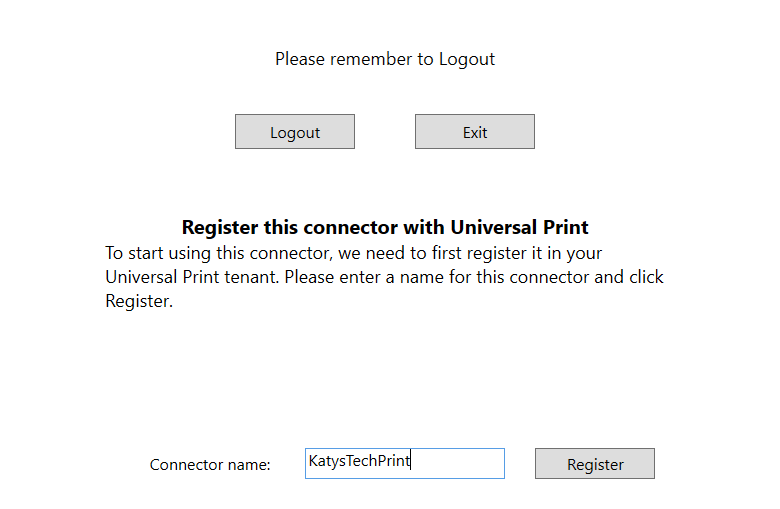
Once that's finished you should get something looking a little like this:

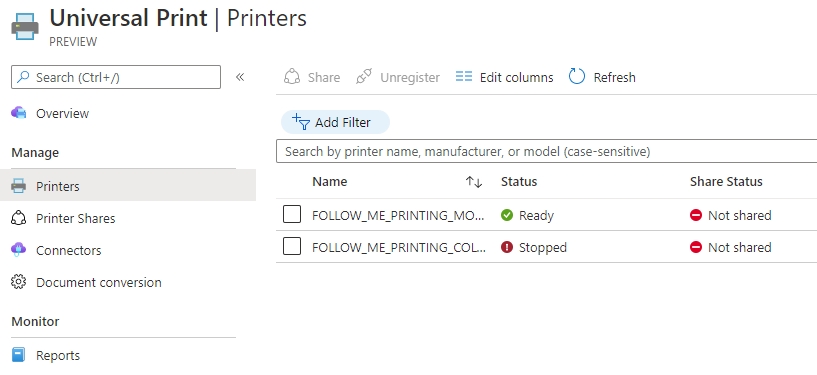
Select the printers you want to register and click Register. They should then appear in the Operations List while they are added, and then finally appear in the Registered Printers section.
If you are using any sort of print management system that relies on knowing which user is printing for tracking/charging purposes and are running on premise Active Directory with Azure AD Connect syncing your users to Azure AD, you'll need to turn on "Enable hybrid AD configuration". This basically gets Universal Print to look up the AD username of the person printing and impersonate them when submitting the job.
Managing Universal Print
Go to the Azure portal and find Universal Print. You should now have a console where you can view your registered printers, the print shares, connectors and if you click through an individual printer you can manage the job log, sharing and permissions.
Clicking on one of your printers will show the tasks you can do with the individual printer - share the printer, manage jobs, Printer Properties, Access Control and view which connectors it uses. You can't set access control until you have first shared the printer, so let's do that now.
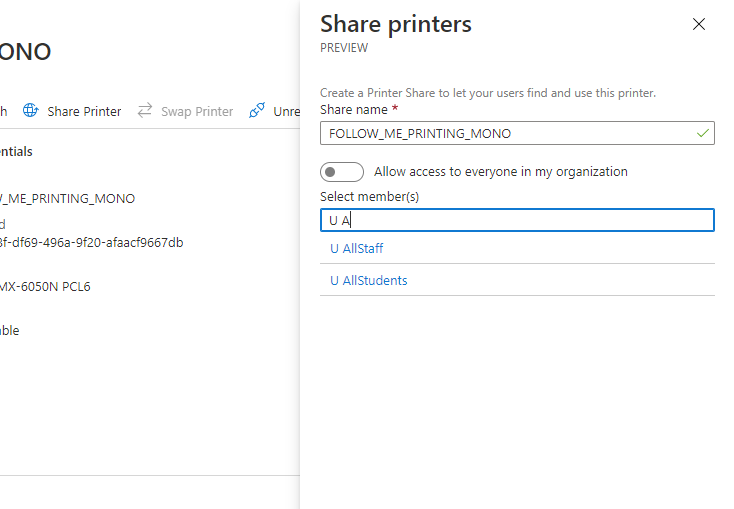
Click on Share Printer on the menu bar. It will then bring up a screen where you can set the share name and individual permissions. You can search for users or groups here, or tick to allow access for all users.
Next step is to go to Printer Properties. Have a look at the settings and make any changes you need - in my case I've gone into Printer Defaults and changed the paper size from Letter to A4. You can also set detailed location information which is used when clients are searching for their nearest printers.
On the overview page there is also a button called Swap Printer. This is used if you need to replace the printer but want to keep the share and permissions.
Installing Printers on Client Devices
As long as the client device is Azure AD joined, Hybrid Azure AD joined or Azure AD registered, and the user has been given a licence for Universal Print and has permissions on the required printers, they should just be able to go into Settings > Devices > Printers and Scanners and add a printer by clicking Add printer or scanner.
Most of us are probably currently deploying printers by either Group Policy Preferences or a logon script or similar, so we want these printers to actually be installed automatically for the users rather than the user having to click about and find and add the printers they need. Luckily we can do this with Intune.
If you've already got Hybrid Cloud Print set up you will need to remove this configuration first of all by deleting the following registry keys:
HKEY_LOCAL_MACHINE\SOFTWARE\Microsoft\PolicyManager\current\<SID>\EnterpriseCloudPrint
You'll also need to remove any profile deployment in Intune to stop it from just re-applying the settings.
Now we need to download the Universal Print Provisioning package from https://aka.ms/UPIntuneTool_DL. This is a Win32 app package (intunewin) which we need to deploy - see this post for details on how to deploy a Win32 app package - and a zip file with a script to install the printers and a sample CSV. Deploy the UniversalPrintPrinterProvisioning0.1.0.0.intunewin package with the following settings:
Requirements: 32bit and 64 bit selected
Minimum OS: Windows 10 1903
Detection Rules: Manual, Rule type: MSI
Next prepare your folder structure for creating the win32 package - I've gone with d:\intune\printers\source and placed the cmd and csv files in here, and created d:\intune\printers\output for the finished package to go in.
You need to prepare the CSV file now, which needs to list the printers you want installing with the column names SharedID, SharedName, IsDefault. The SharedID and SharedName can be found in the UP Portal:
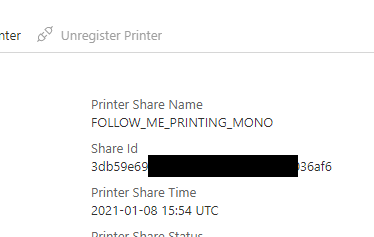
and the CSV file will look something like this:
SharedId,SharedName,IsDefault
3db59e69-xxxx-xxxx-xxxx-d80dbf036af6,FOLLOW_ME_PRINTING_MONO,Yes
d97642f2-xxxx-xxxx-xxxx-60e1758baefe,FOLLOW_ME_PRINTING_COLOUR,
Now create your intunewin package:
.\IntuneWinAppUtil.exe -c d:\intune\printers\source -s InstallPolicy.cmd -o d:\intune\printers\output -q
Next step is to deploy this InstallPolicy.intunewin package. The configuration for this varies depending on if you are deploying to devices or users.
Devices:
- Install command: InstallPolicy.cmd device install
- Uninstall command: InstallPolicy.cmd device uninstall
- Install behaviour: system
Users:
- Install command: InstallPolicy.cmd user install
- Uninstall command: InstallPolicy.cmd user uninstall
- Install behaviour: user
Remove all the Return Codes apart from Success.
As per the previous package, the requirements are both 32 and 64 bit, and Windows 10 1903.
For the detection rule we're going to use a File rule, to detect the presence one of the following depending on if you are targeting devices or users:
Device: %ProgramFiles%\UniversalPrintPrinterProvisioning\Configuration\printers.csv and it's a 32 bit app on 64 bit clients
User: %AppData%\UniversalPrintPrinterProvisioning\Configuration\printers.csv
and then complete the deployment.
You won't get many options when printing as the universal driver has to work with all kinds of devices - but it's a much better selection than you got on Hybrid Cloud Print.

Removing a Connector
If you need to remove a connector, unfortunately you can't do this from the portal. You'll need to still have access to the server running the connector.
- Unshare all the printers that use the connector from the Portal
- Unregister all the printers that use the connector, either from the Portal or from the server itself
- In an elevated PowerShell window, run:
Install-Module UniversalPrintManagement
Connect-UPService
Get-UPConnector
Remove-UPConnector -ConnectorId
copying the output of Get-UPConnector to find out your connector ID to feed into Remove-UPConnector. Make sure the account you use to sign in has Printer Administrator or Global Administrator rights, and a licence for Universal Print assigned to it. - Restart the Print Connector Service to clear up any local data, and then uninstall the connector.
Further Reading
- Universal Print - Frequently Asked Questions (FAQ) | Microsoft Docs
- Universal Print - Get started | Microsoft Docs
- License Universal Print | Microsoft Docs
- Installing the Universal Print connector | Microsoft Docs
- Enable Hybrid AD/AAD environment on Universal Print | Microsoft Docs
- Universal Print printer provisioning tool | Microsoft Docs
In this post
- Introduction
- Installing the UP Connector
- Managing Universal Print
- Installing Printers on Client Devices
- Removing a Connector
- Further Reading
Support My Work
I hope you find my content useful. Please consider tipping to support the running costs of hosting, licensing etc on my Ko-fi page.
