
WAC: Azure Backup
If you've connected Windows Admin Centre to Azure you'll find a section called Azure Backup. This will allow you to back up your on-site workloads to Azure using the Microsoft Azure Recovery Services agent. It's ideal for backing up physical servers or individual virtual machines.
In this post I'm going to look at configuring and backing up a server through Windows Admin Centre, and then at how to recover the data - both for a partial failure (such as some files being deleted but the server still boots) and a total failure.
Creating the Vault
The first step here is to create a Recovery Services Vault in Azure if you haven't already got one. From the Azure Portal go to Recovery Services Vault and create a new vault. There's not much to fill in here, just the vault name and region.
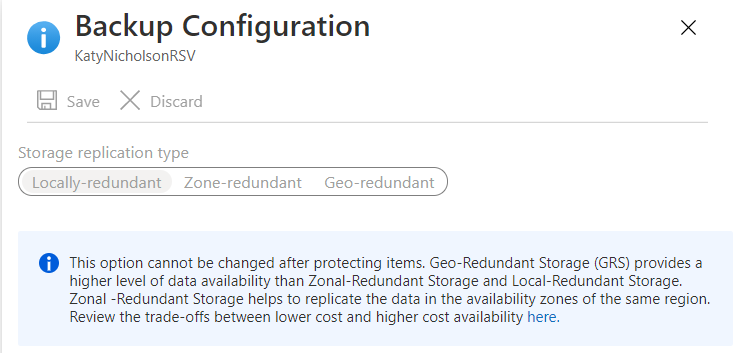
Once you've made this, click into the vault and then onto Properties. Scroll down to Backup Configuration and click on Update. Select the storage replication type you want to use and save. Locally-redundant data is cheapest but less resilient, through to Geo-redundant which is the most expensive but most resilient. You can find pricing details here including an explanation of how the charges are worked out for each replication type.
Configure Azure Backup
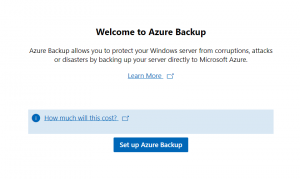
Next step is to configure Azure Backup on the server you want to protect. From Windows Admin Centre, click onto your server, then onto Azure Backup on the left hand menu, and finally Set up Azure Backup.
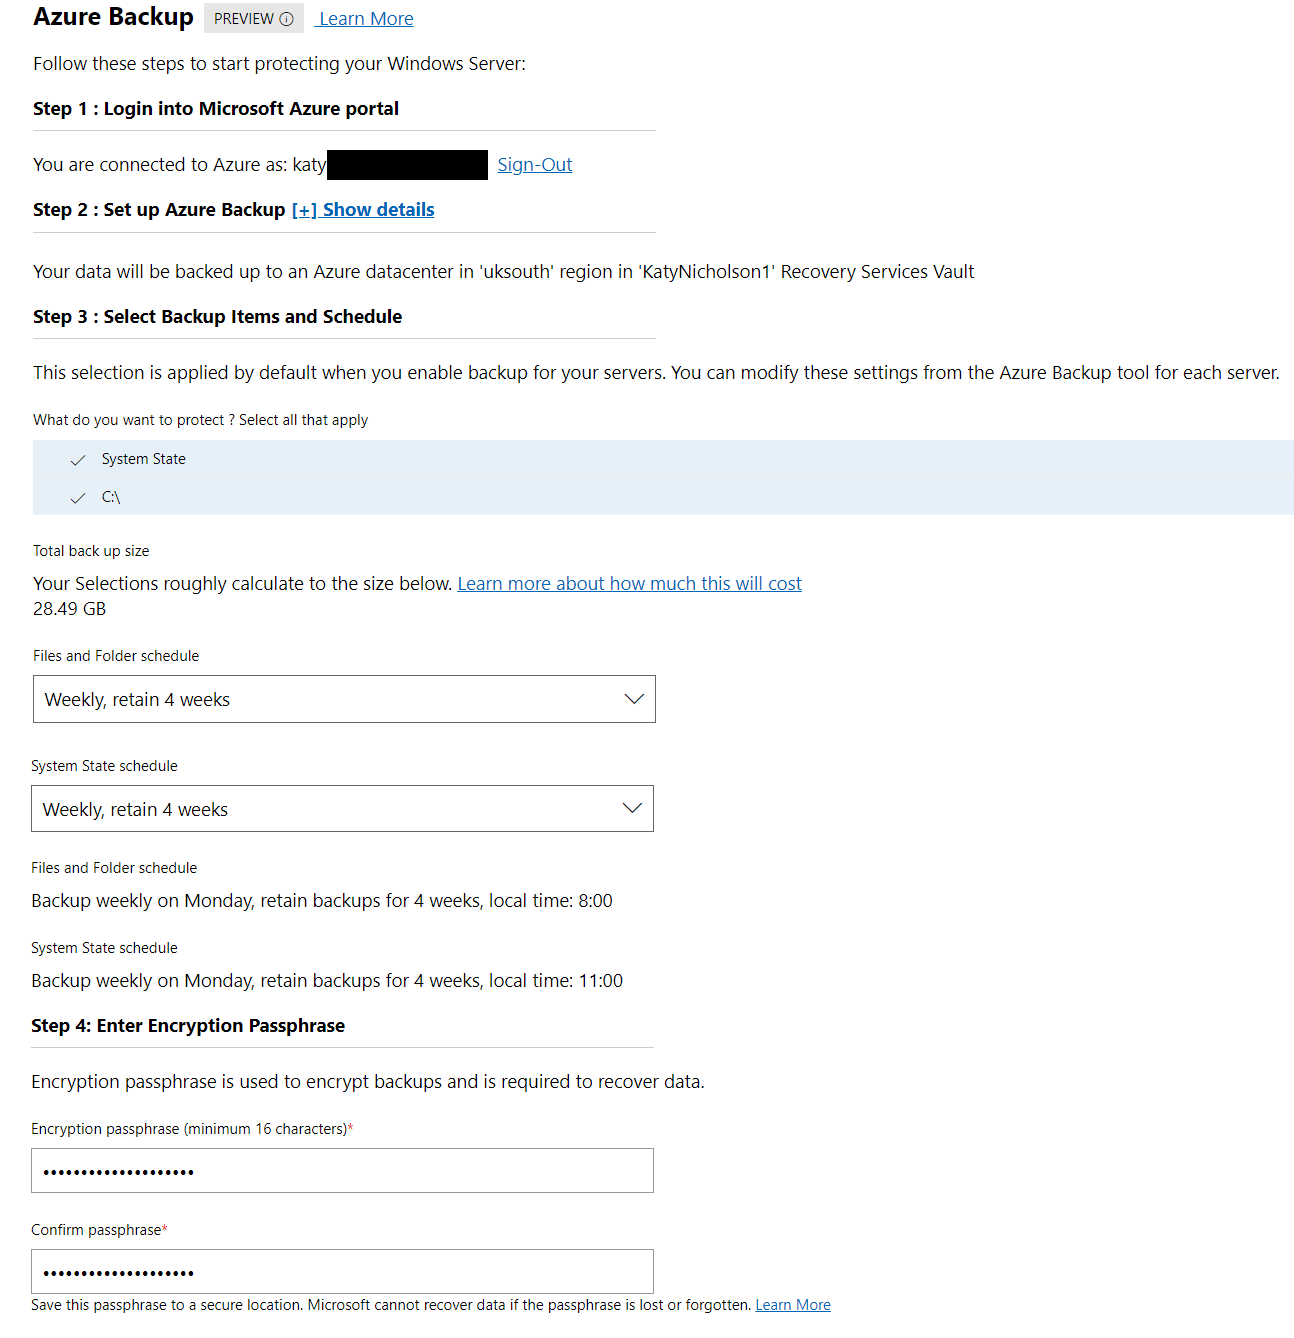
Now follow through the steps to log in to Azure and select the items you want to back up - in this example I'm backing up the System State and C:\ Drive Files and Folders, there are a few other options for this depending on the workload such as SharePoint farms, Exchange servers and SQL databases. Pick the backup frequency and retention schedule and enter the encryption key - generate a random long string for this and keep it somewhere safe.
It will take a while to set everything up and eventually present you with a screen showing the backup overview - obviously you've not run any backup jobs yet so this will just be some charts showing nothing has happened. If you want to kick things off, scroll down to Protected Items (it's off-screen on my screenshot) and click on Backup Now - otherwise wait for your first scheduled backup to run.
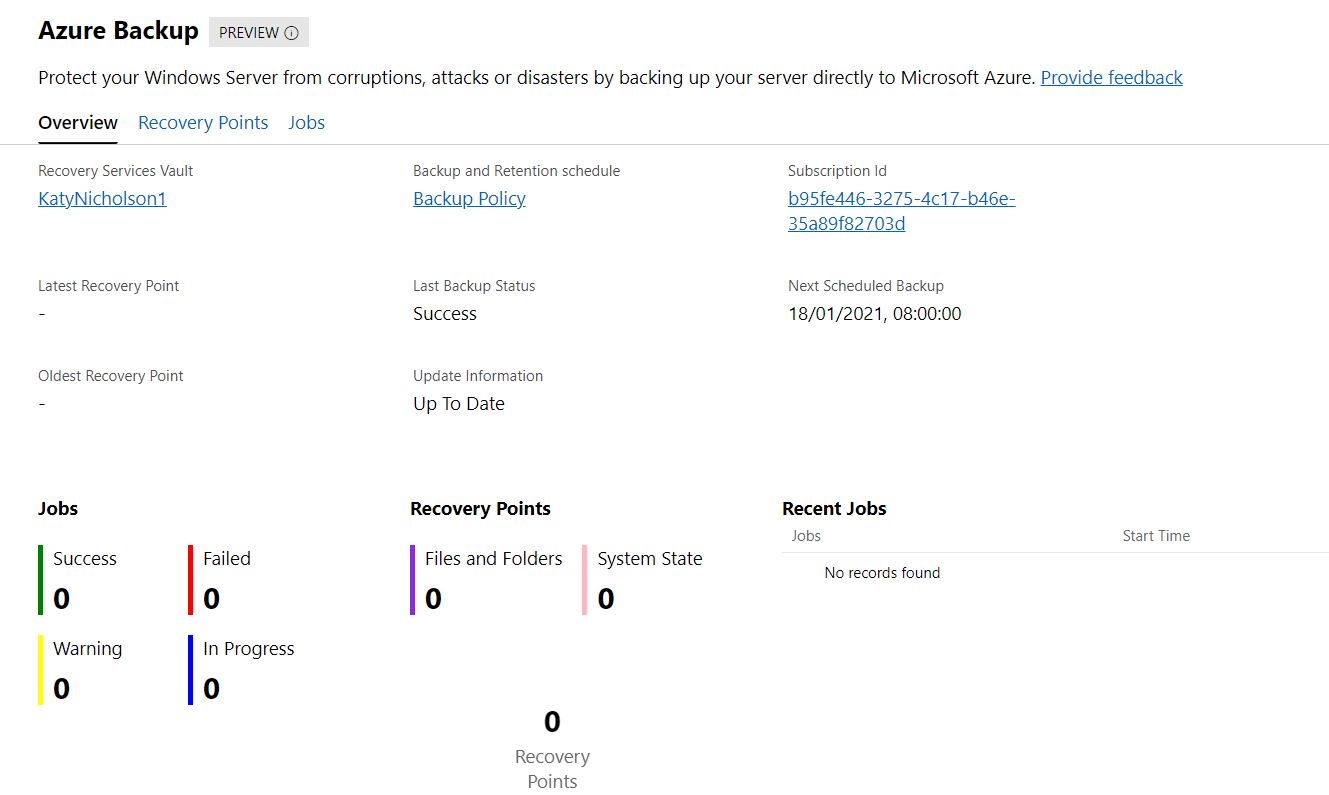
You can monitor the state of the current backup by clicking on the Jobs tab, although it's not too detailed it will tell you what's happening just don't expect progress indicators.
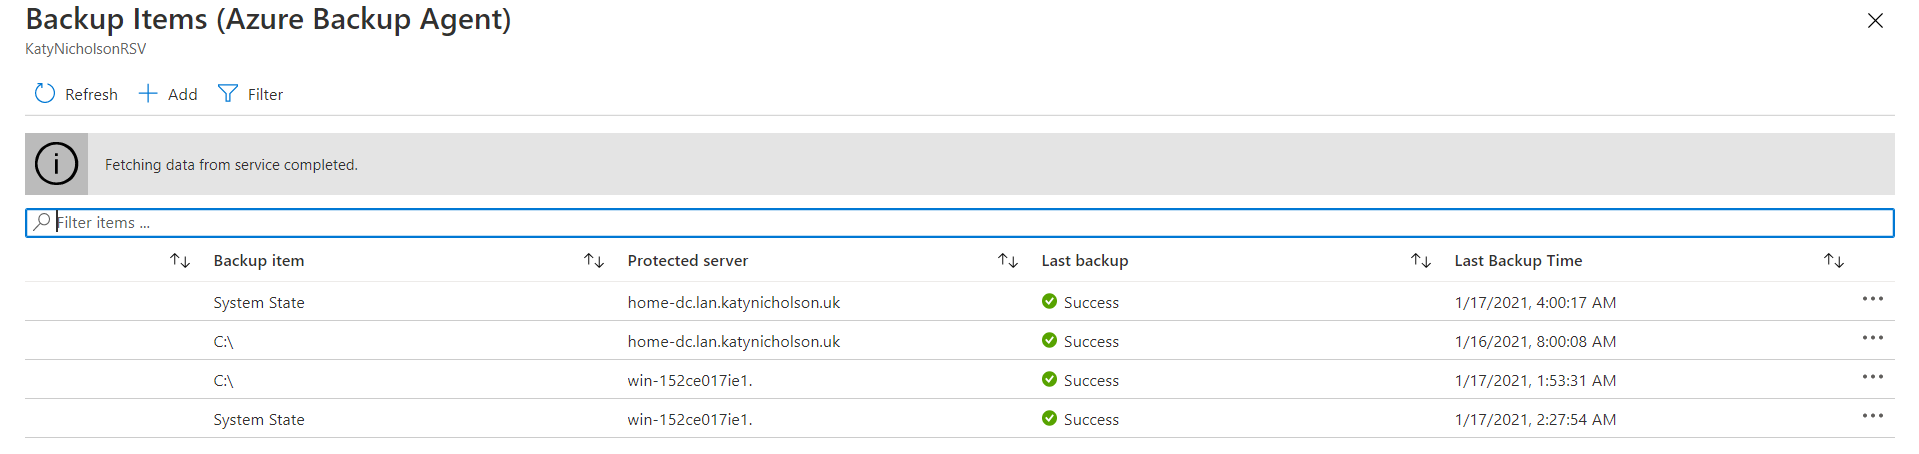
Once your backup's complete, if you want to check on the status of all your backups you can take a look inside the Recovery Services Vault in Azure, then into Protected Items > Backup Items, then Azure Backup Agent.
Configure Monitoring
So now we've got our backups running, what next? Well ideally we'd want to be alerted when something has gone wrong (or even alerted when it's gone right - then we know if we miss an email we're expecting daily something has happened). On the Backup Jobs page there is a button named Alerts and Notifications - click this and it will open the Azure Portal and take you to your Recovery Services Vault's Backup Alerts page.

Here you'll see a list of any alerts which are currently active (none here, lovely) and you can click Configure Notifications. The nice bit about this is that the alerts are sent from Azure rather than from your WAC server, so there's no configuring SMTP settings or anything like that to worry about.
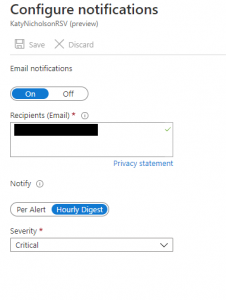
Currently it only supports sending e-mail alerts however you can send to multiple recipients and you can either notify once per alert or with an hourly digest - if you've got lots of backups and are notifying on success you'd maybe want the digest to cut down the number of emails you're receiving. Select the alert severity from Critical, Warning and Information (or any mix of these).
Recovering Data
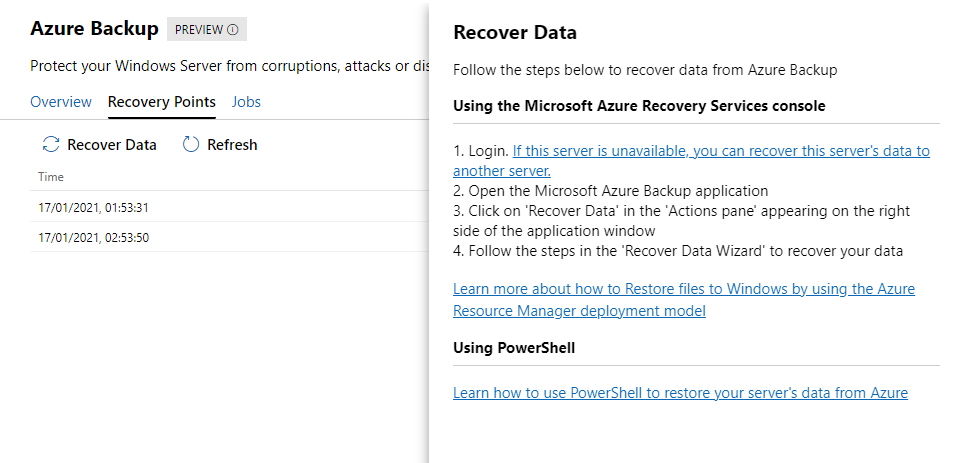
You can't rely on any backup if you've not tested that you can actually recover it. If the server is still working you'll have noticed that on the Recovery Points tab there's a button called Recover Data. Clicking it will tell you that you can't recover data through Windows Admin Centre at the moment (hopefully in a future update to the Azure Backup extension guys?) so you'd have to drop to the server and open the Azure Backup application, or use PowerShell. I'm just going to go through using the GUI application here, but see the Microsoft docs for how to do this using PowerShell.
Recovering to the same server
If your server is still functional and you just want to roll back to a previous backup, or recover some files, it's fairly easy. Open the Azure Backup application and click on Recover Data.
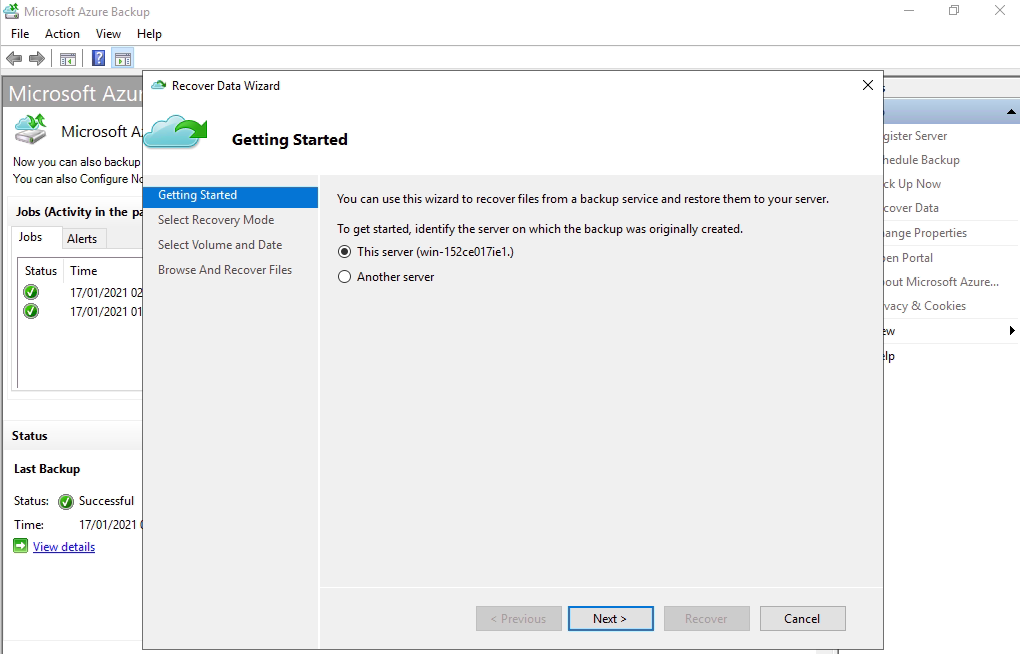
Work through the wizard - you can select from the following types of restore:
- Individual files and folders - useful if you've deleted something by mistake
- Entire volume
- System State
You can only pick one type of restore so you might need to run through this a couple of times depending on what you're trying to do.
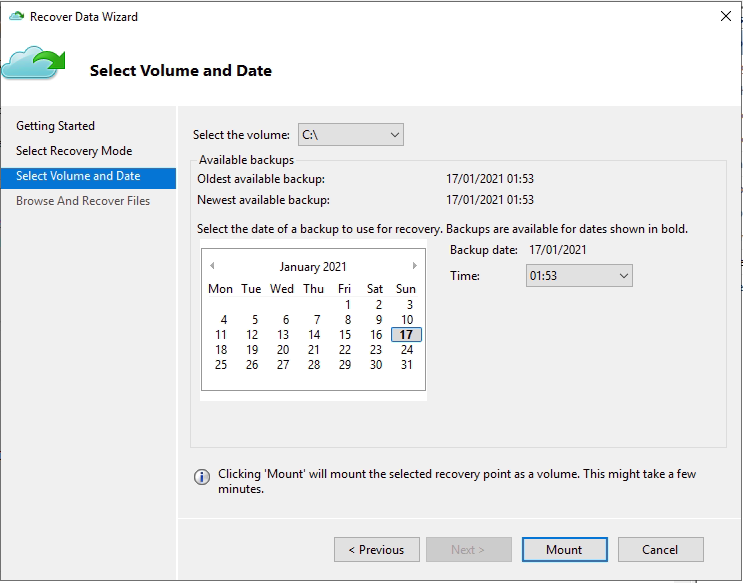
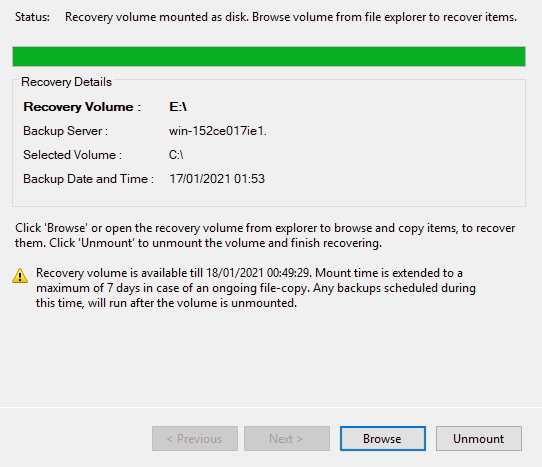
Pick the recovery point you want to use and click Mount. It'll now go away and load the data - if you want to monitor this you can do so from Windows Admin Centre as this shows up as an active job.
If you've chosen to restore files and folders it will mount the backup as a virtual disk for you to go have a look at in file explorer.
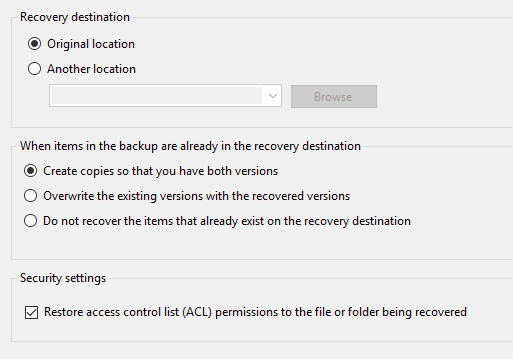
If you've chosen to recover an entire volume, you'll be given the choice to recover to the original or a different location, along with what to do if the data already exists, and whether you want to restore the NTFS file permission ACLs on the recovered data.
Finally if you're restoring the system state, this is a little more involved. You'll be asked where you want to save the System State files to - just pick a folder and it'll make a system state archive. I'd strongly recommend avoiding the C drive, however I don't want to add a second drive onto this system that exists purely for demonstrating Azure Backup.
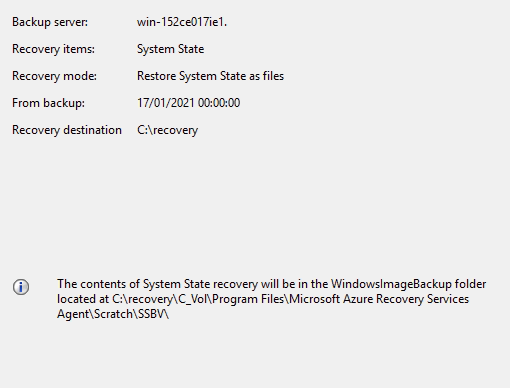
If you've chosen to restore the system state archive to the C: drive, you'll now need to put the data somewhere accessible. The backup wizard won't restore an archive off the C: drive without you looping back via the UNC path, and the path above is too long for Windows to cope with. I just moved everything from c:\recovery\C_Vol\Program Files\Microsoft Azure Recovery Services Agent\Scratch\SSBV\ to C:\recovery.
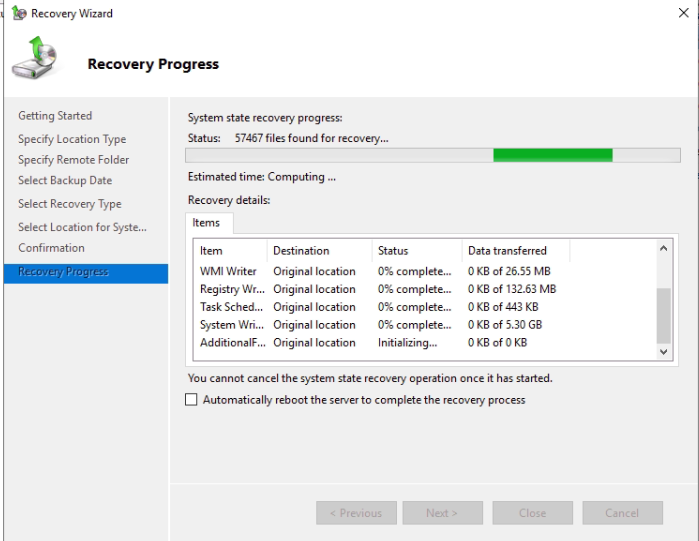
Next we'll need to open Windows Server Backup, you can find this under Administrative Tools on the server. Click on Local Backup in the tree view, then Recover at the right hand side. Work your way through the wizard:
- Select "Backup stored at another location" (even if you've restored the system state archive to this machine)
- Select Local drives if you've saved it anywhere local other than the C: drive and browse to the path indicated by the wizard when you created the system state archive. Otherwise you'll have to go via the network path if it's on another system or on the C drive. In this case I've had to enter \\servername\c$\recovery.
- Select the available backup
- Select System State as the recovery type
- Select Original Location as the recovery destination.
- If you are restoring an Active Directory Domain Controller you'll be asked if you want to perform an authoritative restore. Be careful and only select this if you actually need to do so.
- The server should now restore its system state and eventually reboot.
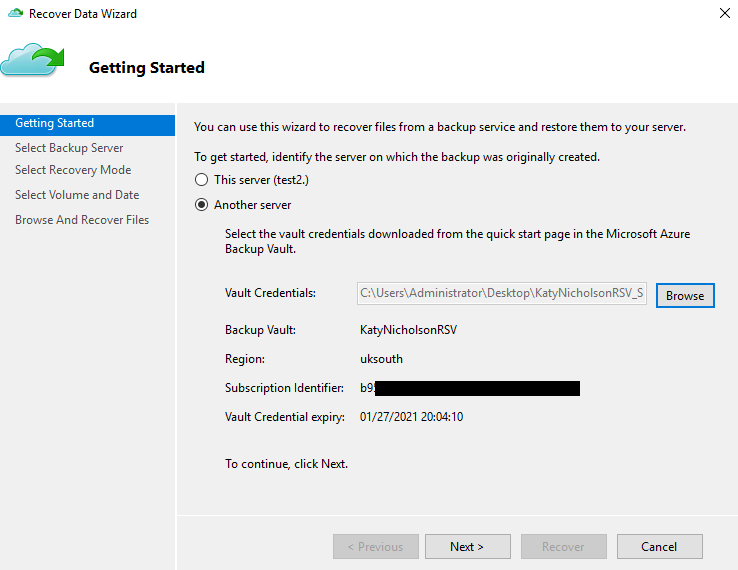
Recovering to a new server
If your server is completely unusable you can recover your backup to a new target server. You'll need to build up a server for this, running the same version of Windows as the original server, and then download and install the Azure Backup agent. Once it's installed you'll be asked to register your backup vault and you'll get a screen like this asking for the credentials.

To get your vault credentials, go back to the Azure Portal and into your Recovery Services Vault. Click on Properties, then scroll down to Backup Credentials and tick that you're using the latest agent (as you've just downloaded and installed it). Finally, click Download to get your credentials file. This needs to be saved onto a local disk on the target server, you can't put it on a network drive.
Next enter the encryption string. This doesn't have to be the one you used when setting up Azure Backup at the beginning, as it's what will be used to back this server up in future, rather than for restoring from another computer. Finish the wizard and it will register the new server, and launch the Microsoft Azure Recovery Service Agent console.
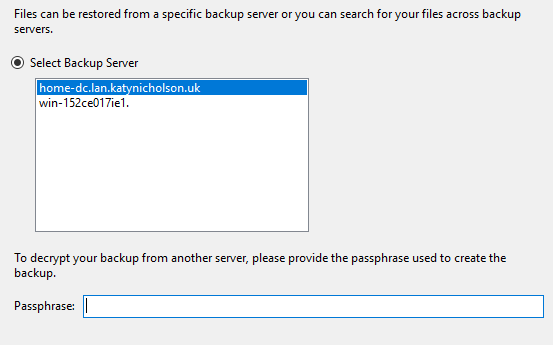
To recover data, you now need to click Recover Data as we did earlier when restoring to the same server. This time we'll say the data was backed up on a different server, and provide the vault credentials again.
Next it should connect to the vault and show a list of protected servers. Pick the server you want to restore from, and enter the encryption string that you set up back when you first protected the server.
Now we've got this far, it's basically the same steps as if you were restoring to the original source server with the instructions above.
Further Reading
- Backup your Windows Servers from Windows Admin Center with Azure Backup | Microsoft Docs
- What is Azure Backup? - Azure Backup | Microsoft Docs
- Create and configure Recovery Services vaults - Azure Backup | Microsoft Docs
- Pricing ? Cloud Backup | Microsoft Azure
- Restore files to Windows Server using the MARS Agent - Azure Backup | Microsoft Docs
- Restore System State to a Windows Server - Azure Backup | Microsoft Docs
- Use PowerShell to back up Windows Server to Azure - Azure Backup | Microsoft Docs
In this post
- Introduction
- Creating the Vault
- Configure Azure Backup
- Configure Monitoring
- Recovering Data
- Further Reading
Support My Work
I hope you find my content useful. Please consider tipping to support the running costs of hosting, licensing etc on my Ko-fi page.
