
Windows Admin Centre

Windows Admin Centre is a web based server (and desktop) administration package which, eventually, should replace the majority of the work currently done through MMC consoles and snap-ins. If you've ever opened Server Manager on a Windows 2019 machine you'll have seen the popup telling you to "Go get Windows Admin Centre!". Whilst it's not there yet, it is constantly being updated and improved and I find it really useful.
It's a lot more than just managing a couple of systems - when I set up our hyperconverged Hyper-V cluster I primarily did this from within WAC (post to follow on this if I get chance to write it up) - and it integrates nicely with a lot of Azure services (including any Azure VMs you might have)
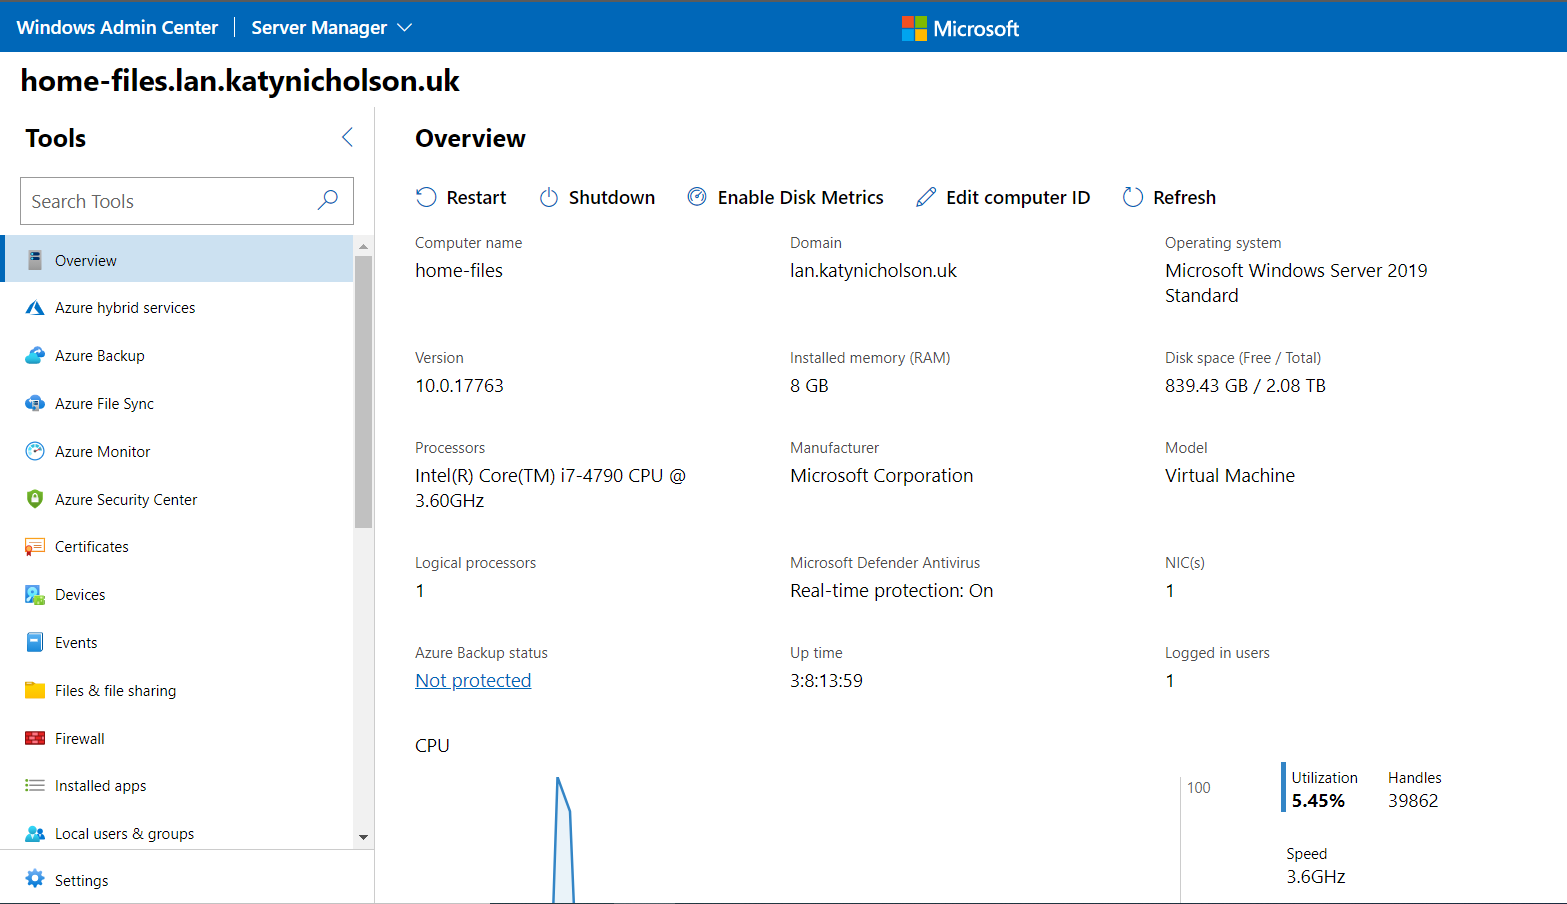
Windows Admin Centre will install onto any Windows 10 or Server 2016/2019 computer (except for domain controllers), and doesn't need IIS. I tend to put this on the same server that I use for other management tasks such as backup console.
To get started you'll need to download the installer from the Evaluation Centre - rather annoying start in my opinion, not sure why they've gone down this route rather than it just being a straight forward download given it's free and in general availability - but fill out the form with your details and it'll give you the installer.
Fire up the installer and work your way through the wizard. It doesn't use IIS so will prompt you during setup for the port number you want to use, and for the SSL certificate thumbprint.

If you're only installing this to see what all the fuss is about, or on a test system, you're probably fine going with the self-signed certificate and just ignoring the browser warnings each time, although I'd strongly recommend a real certificate for use in production. You can pull up a list of locally installed certificates and their thumbprints in PowerShell by running Get-ChildItem -Path Cert:LocalMachine\\My or if you'd rather do this through MMC see this post.
You can change the port and SSL certificate once installed by going to Control Panel > Uninstall or change a program, selecting it and clicking Change.
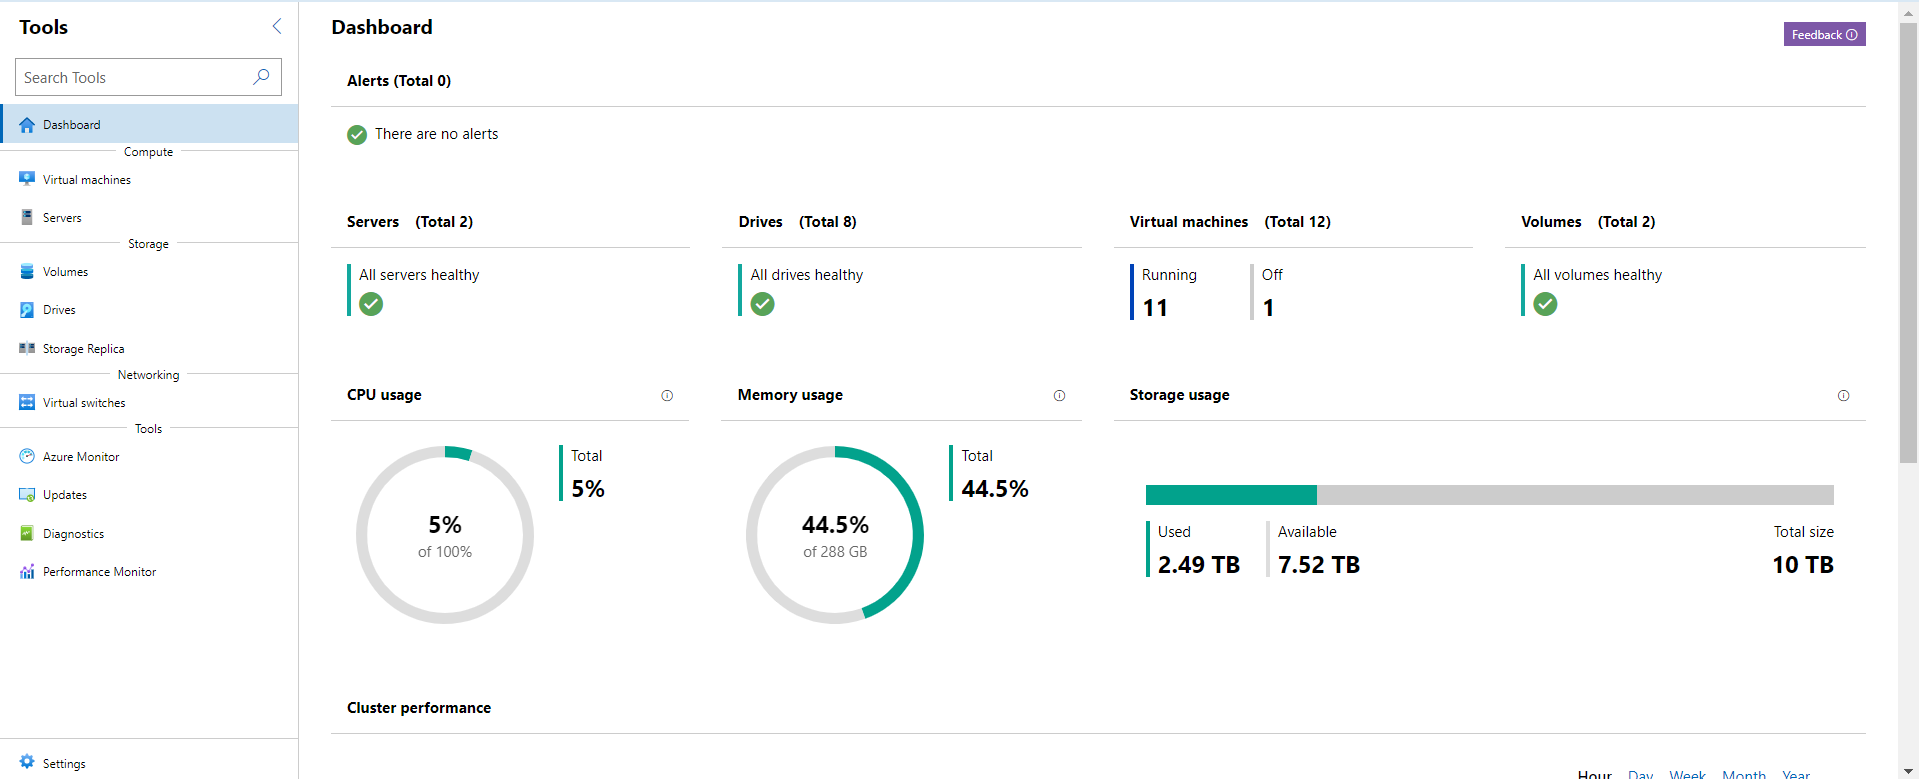
Once you've finished the installer, go to https://<server-name>/ in a browser - if you opted for a self signed certificate then you'll need to bypass your browser's security warning, equally if you changed the port from 443 you'll need to tag this onto the end of the URL. Once logged in you should see a window showing the computer you installed WAC onto, marked "Gateway".
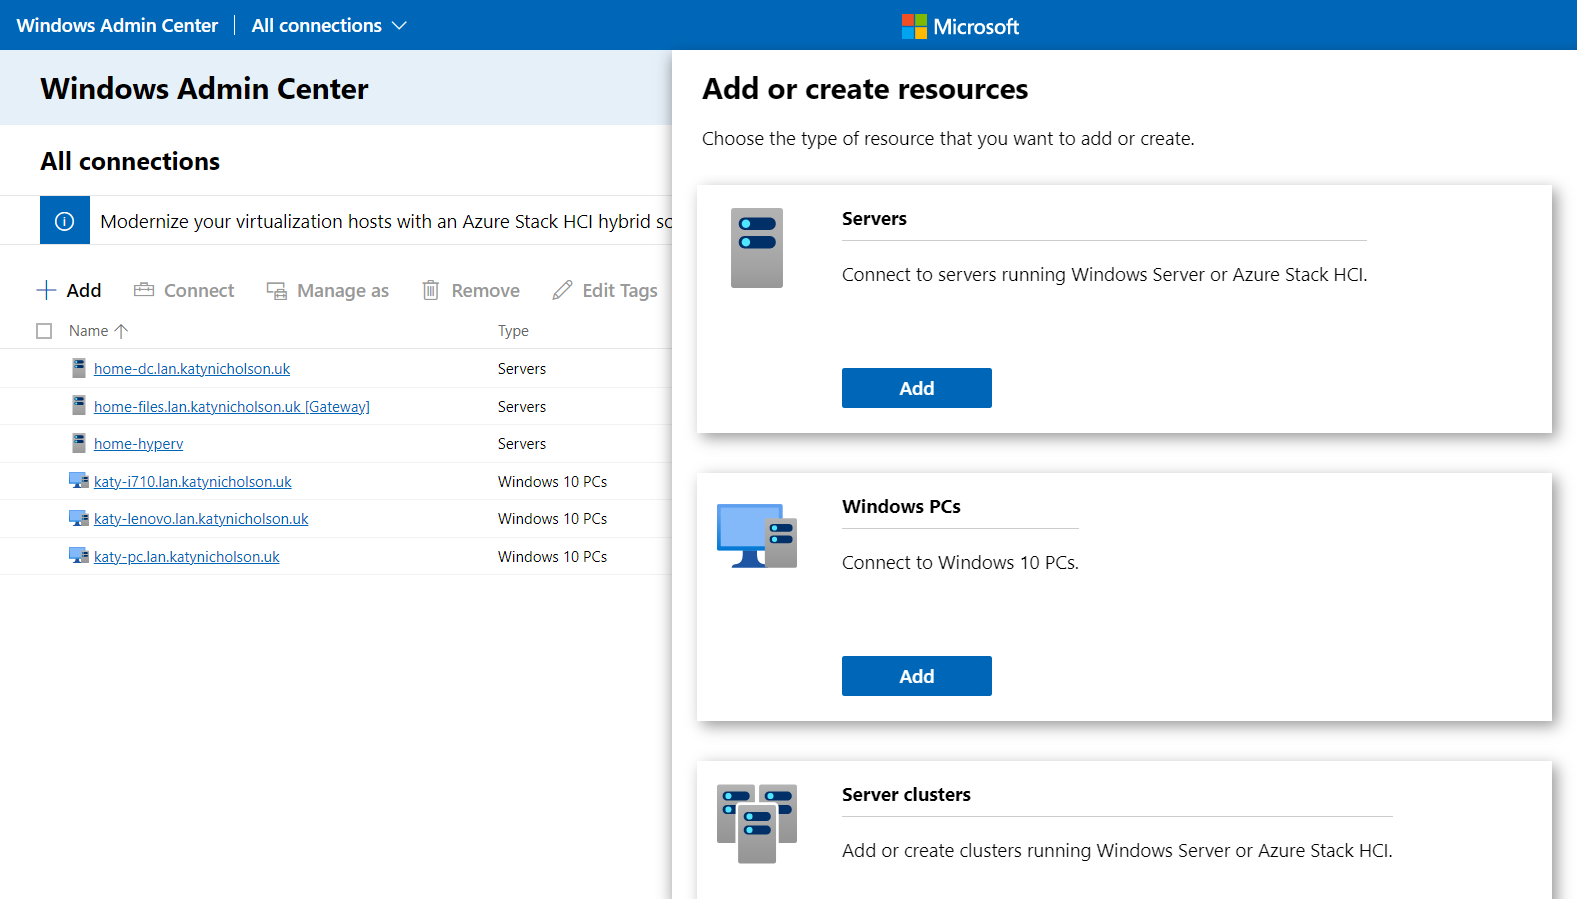
To add the rest of your servers, click on Add and then again on the Servers section. You can then either type in a server name, or import a list, or search Active Directory.
I won't go through every extension - just spend some time having a look around - although some of the key sections I'd say would be Events, PowerShell and Updates. I'm going to go through some of the virtualisation bits in more detail along with connecting this up to Azure.
Managing a Hyper-V Host
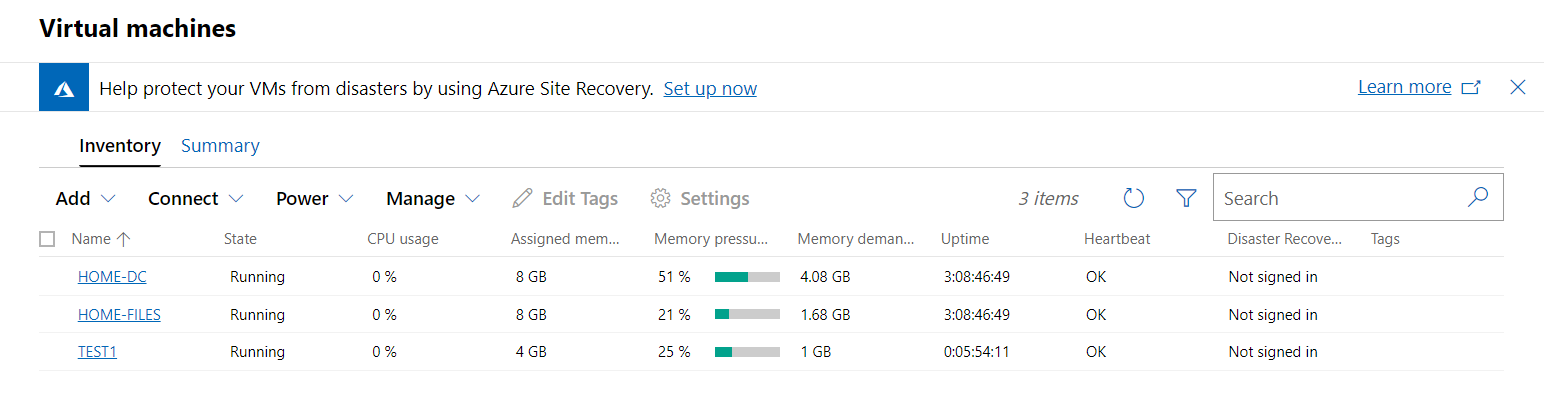
If you've got a Hyper-V host (or cluster) running as one of your servers, you can open the Virtual Machines extension off the left hand bar. From here you can see the virtual machines running on the host/cluster, and you can control the power (turn on, shut down etc), manage the VM settings, and perform a range of tasks such as moving the VM, cloning it, joining it to a domain and more. You can also create a new VM from here.
Going into an individual virtual machine, you will get an overview showing the configuration and resource usage, and can also edit the VM settings here and you can alter pretty much everything you'd need without having to drop back to the MMC tools - CPU, RAM, Storage, Networking, Checkpoints, Boot order and Secure Boot settings.
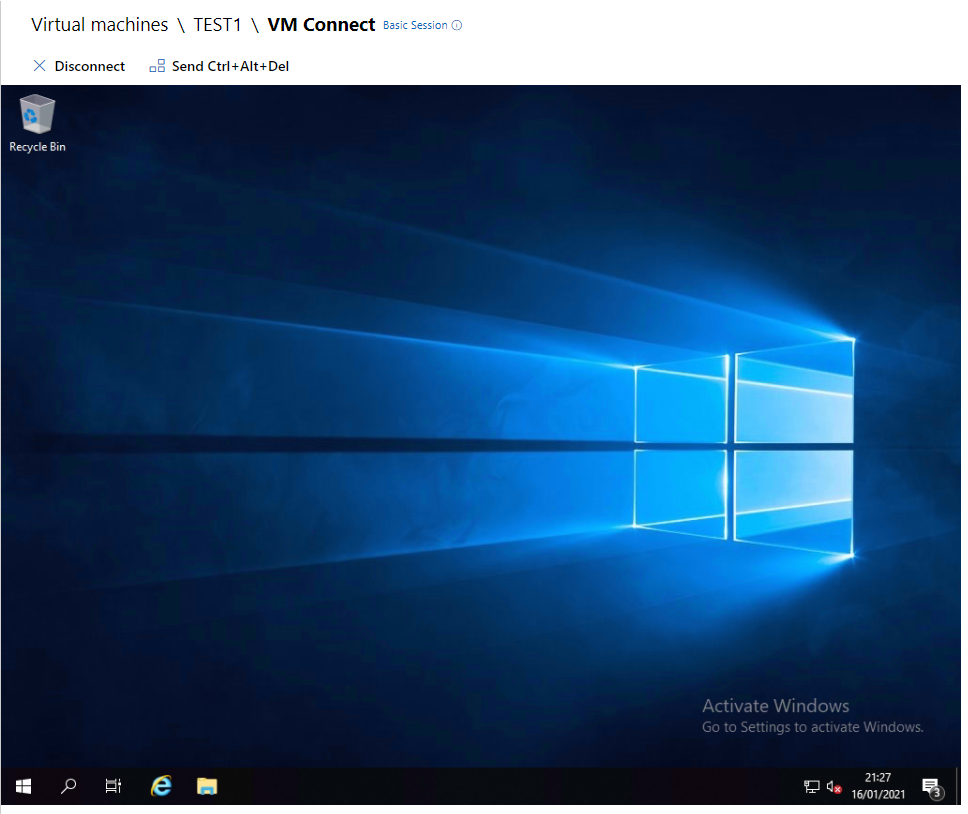
You can also connect to the VM console here - it's really slick as it's completely browser based and doesn't need any nasty Flash/Java/ActiveX plugins that perhaps web based systems in the not too distant past would have needed. My only gripe with this is how it functions if you're using a small screen (such as a laptop) and the console screen is too big to fit - you can scroll down to reveal the task bar but if you try and click on it, it scrolls back up and you're clicking in the middle of the screen. The only work-around I've found for this so far is just zooming out to get it all to fit on screen. Hopefully this is something that will be improved in a future update.
If you've added a cluster you'll get a cluster overview screen showing the general usage of your cluster and any alerts or warnings over any hosts with issues or failures. On the Servers screen you'll be able to Pause or Resume a host, which will drain any existing running roles off the host and move to another node in the cluster - and restart/shutdown hosts if needed.
You can also manage the virtual switches, storage replica and drives and volumes available to the cluster here.
Adding Extensions
You can add new extensions and update the installed ones by clicking the Settings icon near the top right, then going to Extensions.
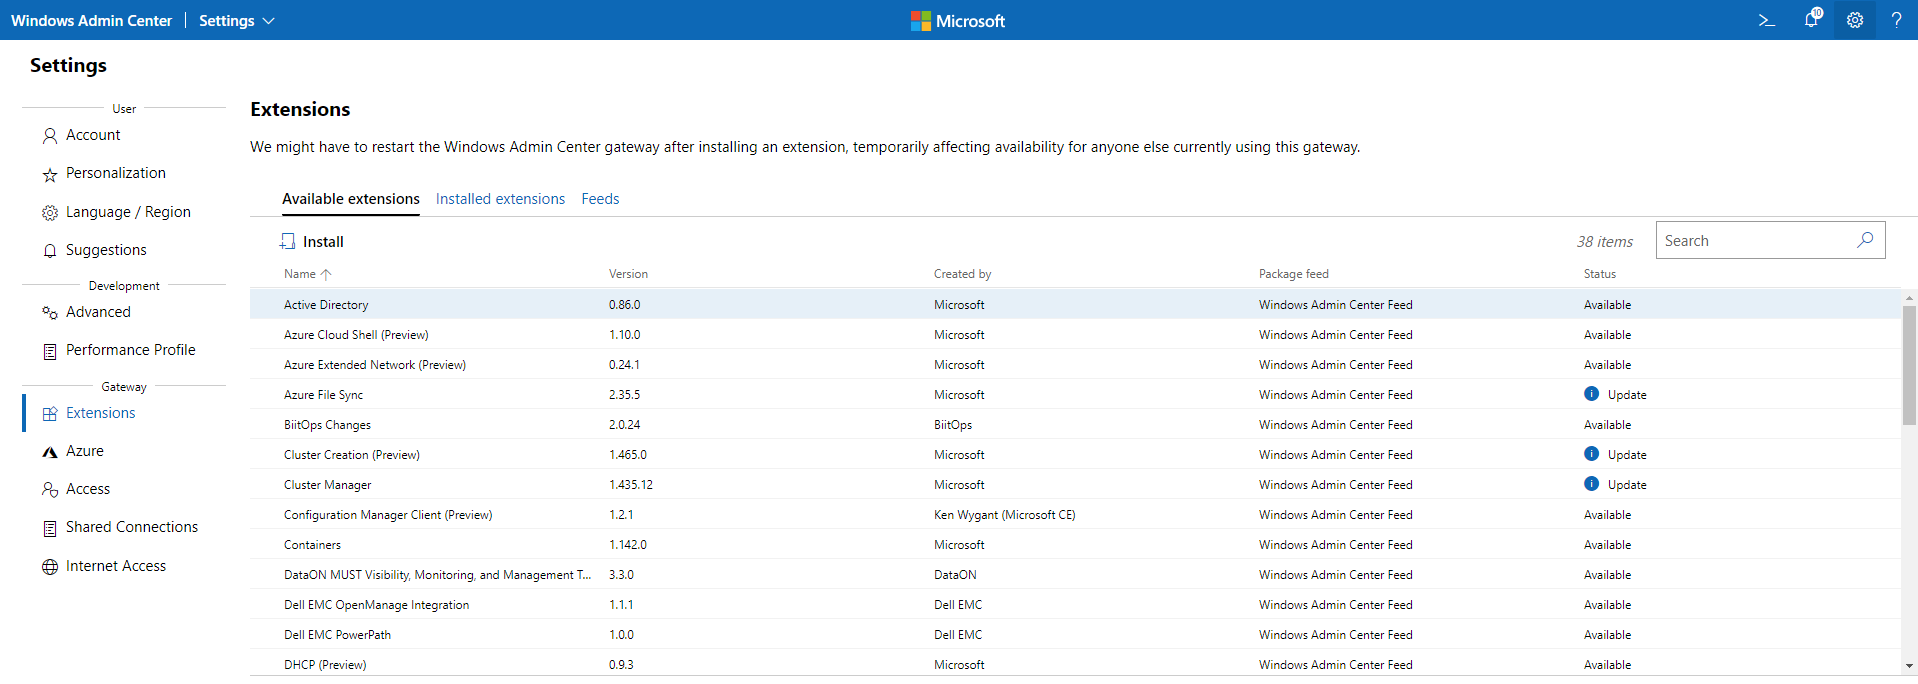
Extensions are easily installed by clicking on the one you want in the list then clicking Install. Unfortunately most extensions will reload WAC in your browser once done, and you can only install one extension at a time currently.
Updating the extensions which are already installed is done from the same screen - click on Installed Extensions and then select each extension that needs updating in turn, and Update. As with installing new extensions it's one at a time currently.
While there's a lot of useful features across the extensions they're not quite ready for us to abandon the MMC snap-ins yet - for example with the Active Directory extension, you'll still need to be dipping back into the MMC or PowerShell to configure user properties such as home drive paths, profile paths or anything that you'd normally go into Attribute Editor to access.
Linking to Azure
WAC can be integrated into your Azure tenancy to bring you management of things such as Azure Backup, Azure File Sync, Azure Monitor and also the management and creation of Azure Virtual Machines, and authentication against Azure AD. To get started, go to the Settings button at the top right, then Azure on the left hand menu.
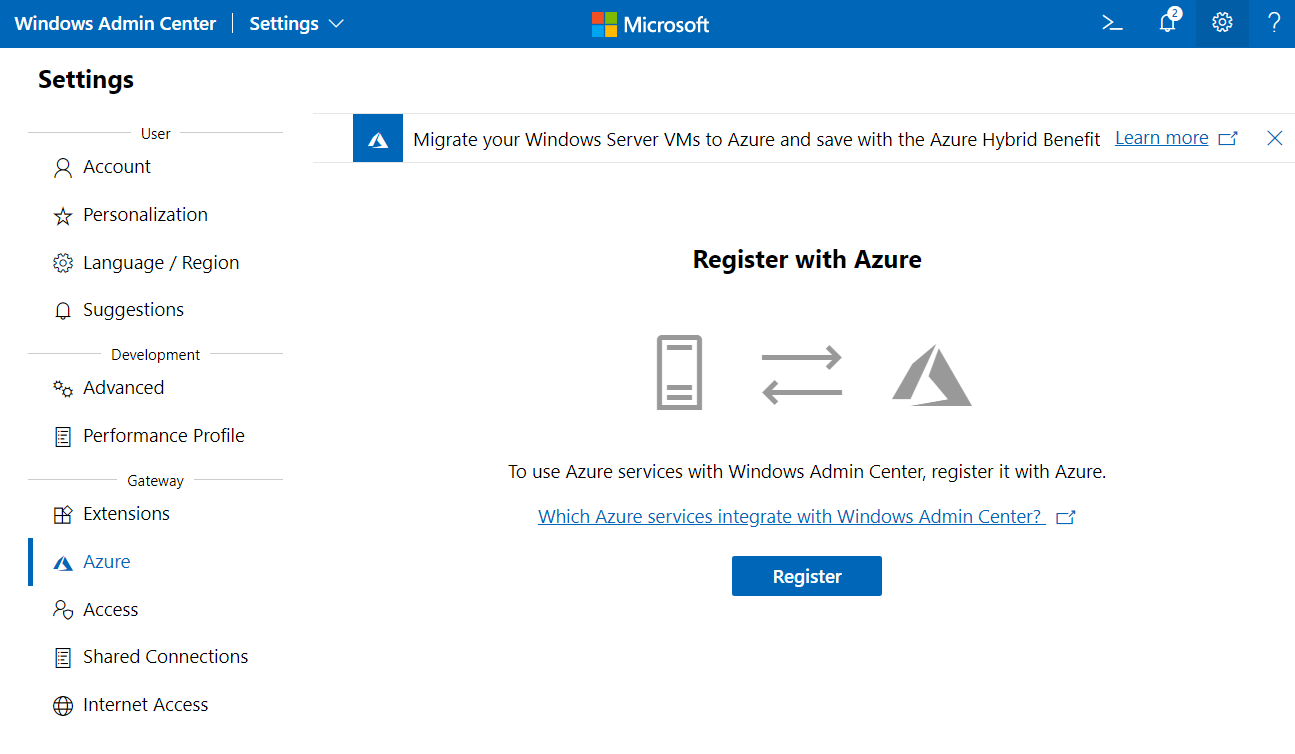
Clicking on Register will start the process - you'll be asked to paste a code into a browser window and log in with an Azure user account with the appropriate permissions. This will then link WAC to Azure and set up the application. If your account has access to multiple tenancies make sure you're linking to the right one - it only shows the tenant ID rather than the name so you'll need to look it up to double check.
More Virtual Machines? Sure!
There'd be no point going through an intro to WAC without mentioning Azure Virtual Machines. Given how most loads are virtual these days, and the benefits of migrating workloads to the cloud, we can manage our existing Azure Virtual Machines in WAC and also create new ones.
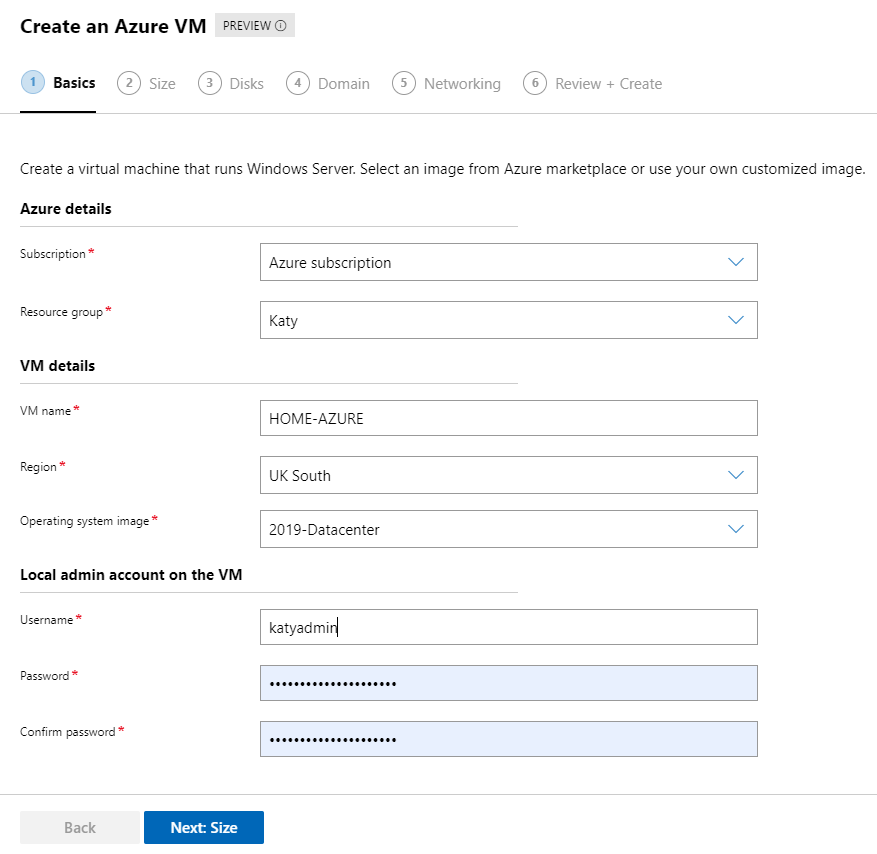
Click on Add and then this time scroll down to Azure VM. You can add your existing Azure VMs here, I'm going to click on Create New as I've not got one on this tenancy.
Work through the steps to create the virtual machine - this mirrors what you'll see if you create a VM directly in the Azure Portal. Make sure you've picked the correct region as this just defaults to the first in the list alphabetically.
Once it's finished setting up your VM, don't forget to check out buying a reservation if you intend on running this for a year or longer - it will really knock the price down and you can still pay monthly even on a 3 year committed reservation. Also have a look at this post as you'll need to set up a VPN between your Azure tenancy and your on-site network in order to manage the Azure VM from WAC.
Further Reading
In this post
- Introduction
- Managing a Hyper-V Host
- Adding Extensions
- Linking to Azure
- More Virtual Machines? Sure!
- Further Reading
Support My Work
I hope you find my content useful. Please consider tipping to support the running costs of hosting, licensing etc on my Ko-fi page.
